More Light Painting
ktuli — Tue, 11/09/2010 - 19:06
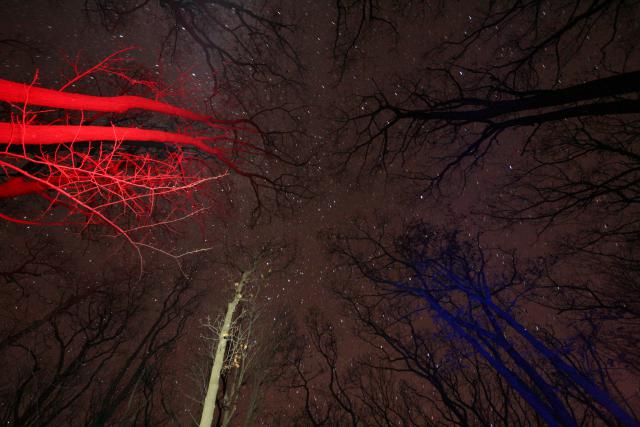
All that beautiful night photography in those time-lapse videos had me thinking about this old set of photos. So far, I've shared the award winning black and white stars and trees as well as the light painted adirondack.
I am usually impressed by night photography, and quite often enjoy looking at the Astronomy Picture of the Day (APOD) when they share night photography.
Anyway, this one combined night photography and light painting...
Technical Data: Canon EOS Digital Rebel XT, Sigma 10-20mm f/4-5.6 EX DC HSM AF at 10mm, Unknown manual exposure length as f/5.6, ISO 1600. Laurel Highlands Hiking Trail.
Hopefully these multiple motivations will get me out there to capture some new night photos and maybe some more light painting.
- Bill
Amazing Timelapse
ktuli — Sat, 11/06/2010 - 20:50
"That was a-MAZ-ing!" - Nick Frost, Hot Fuzz.
First, if you have never seen Hot Fuzz, do yourself a favor and go watch it. Then you'll understand where the quote above comes from, and you'll be able to use it after watching the clip below.
Timescapes Timelapse: Mountain Light from Tom Lowe @ Timescapes on Vimeo.
That clip comes from Timescapes.org which is apparently the site for an upcoming feature film that appears to be chock full of incredible time-lapse photography.
Time-lapse photography has always been something I've been very interested in but never tried. I do have a Satechi Timer Remote Control for my Canon 7D, so I have the means - I just need to actually try it out.
I was also extremely impressed with the time-lapse photography done in the BBC Series - Life (which is another place I like to get photography inspiration).
Enjoy the video, I am sure it will be a while before I have some time-lapse of my own to share, but for now that stuff is incredibly amazing, and despite really wanting to go on a dive trip, I wouldn't mind the chance to spend a night or two out in the south-west.
- Bill
Whale Sharks and Diving
ktuli — Fri, 11/05/2010 - 16:13
We got some news this week - I can't really say if it is good news or bad news or maybe even false alarm news. Basically, we were told that it looked like our Wakatobi trip might have just disintegrated. At first, you might think that is terrible news, but not necessarily.
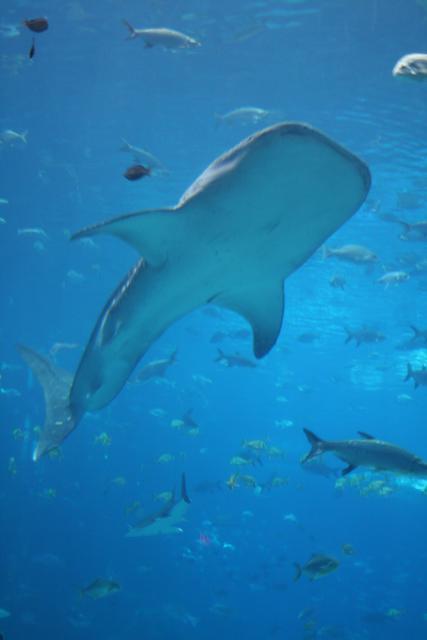 I also received my copy of Scuba Diving magazine, and it had an article about locations for good whale shark diving.
Sorry - again, I'm using a photo that was not taken while diving, but rather from the dry side of an aquarium. This particular one is from the Geogia Aquarium where Anya and I have indeed dived.
So this got me thinking - I'd really love to see a whale shark in the wild. Fortunately, the article pointed out a place where whale shark diving is good in the January/February time frame - Mozambique. And some quick searching came up with some packages with Scuba Mozambique that look absolutely awesome.
The one package includes plenty of diving, but also a visit to Kruger National Park - which for someone like me who loves wildlife photography would be a vacation combination of lifetime!
So what seemed like bad new might end being transformed into good news. Then again, we went out to dinner with our dive instructor and learned that the Indonesia trip might re-materialize, which means it might be false alarm news. So we're just taking it in stride and know that one way or another we'll get to go on an incredible dive trip.
In the meantime, I'm taking the opportunity to browse through these old aquarium photos...
Technical Data: Canon EOS Digital Rebel XT, Canon EF-S 18-55mm f/3.5-5.6 II at 37mm, 1/30 sec at f/5, ISO 400. No post production. Geogia Aquarium, Atlanta, GA.
What Works: The vertical format works perfect here with this orientation of the whale shark, and the diagonal placement is very pleasing. The shark's head rests right on one of those hot-spots where the thirds rest in the shot, and the shape of the shark easily draws your eye along its body to its head. And though the shark's belly is pretty well featureless, this shot from below does place the shark in a position where you would encounter it in the wild as they are surface-swimming filter feeders, and so the placement of the shark in the upper two-thirds of the shot works nicely.
What Doesn't Work: The focus is a tad soft, which isn't exactly surprising with a constantly moving subject in dim lighting through water and acrylic.
That desire to go diving just keeps increasing every minute!
- Bill
Green Sea Turtle
ktuli — Thu, 11/04/2010 - 16:04
 No - sorry, today's shot was not taken during a dive trip. I sure wish I could come back with something this nice from a dive, but as you can see to the right, my most recent encounter got a little too close...
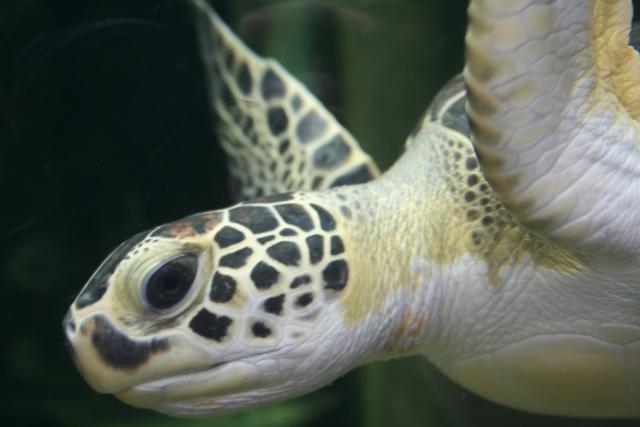
This particular green sea turtle (Chelonia mydas) makes its home at one of the North Carolina Aquariums. Which means that this shot was taken through several inches of acrylic - which is always a challenge.
Technical Data: Canon EOS Digital Rebel XT, Canon EF-S 18-55mm f/3.5-5.6 II at 37mm, 1/60 sec at f/5.6, ISO 400. No post production. North Carolina Aquariums, Manteo, NC.
Why This Photo: I have always liked aquariums, and sea turtles are favorites of mine, need I say more?
What Works: The close-up of this turtles face is very pleasant with the eye of the turtle resting right on the intersection of one of the thirds, with the rest of the turtle taking up the remaining thirds. The colors are vibrant and true to life, while I managed to reduce reflections in the acrylic (though there are still a few) and the blurred background eliminates distractions.
What Doesn't Work: The focus is just a tad soft, and it might have been nice to get some sort of catchlight in the eye of the turtle. And the flipper in the background is a minorly distracting convergence (though not terrible) - perhaps a slightly different angle could have resolved that.
I do have to be honest and say that this photo was taken way back when I had no clue what I was doing (so to speak). I was using pre-programmed modes, and hadn't learned much in the way of technical or artistic ways to take photos. So this was just a combination of luck and the experience I had learned from photo books.
Either way - it is still a very nice shot that has earned a place on our wall and is one of my favorite photos. I often wonder if I could duplicate or improve upon it now with the experience I have gained - hopefully someday I will be able to find out.
- Bill
TTV Mums
ktuli — Tue, 11/02/2010 - 20:04
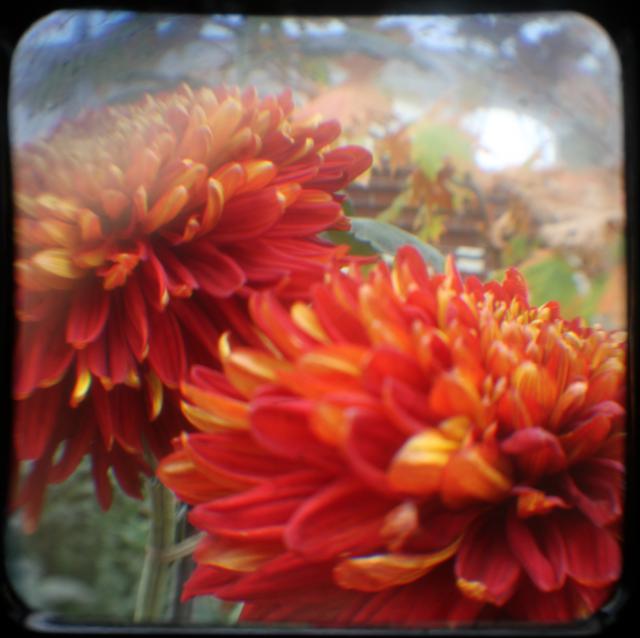
Ok - just one more TTV shot and then I'll give it a break for a while (maybe).
Technical Data: Canon EOS 7D TTV Argus Seventy-Five, Tokina AT-X M35 Pro DX AF 35mm f/2.8 Macro 1:1, 1/10 sec at f/8. ISO 200. Monopod and handheld. Cropped in Photoshop Elements 8.0. Phipps Conservatory.
I think I'll just leave this one open for critique. Enjoy.
- Bill
Happy Halloween!
ktuli — Sat, 10/30/2010 - 20:09
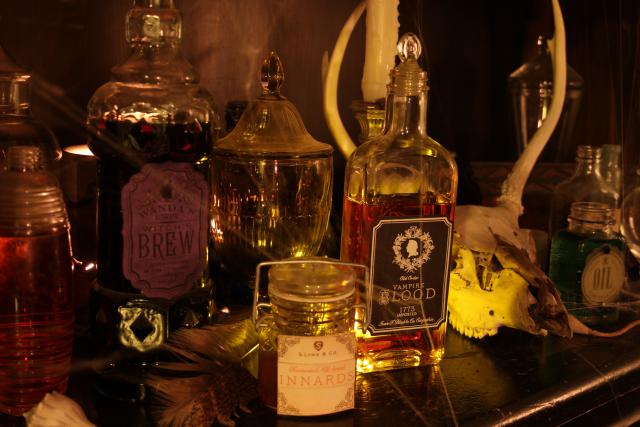
Happy Halloween! We'll take a quick break from the TTV photography today and share a photo I took for Anya several months ago.
Technical Data: Canon EOS 7D, Canon EF-S 18-55mm f/3.5-5.6 II at 33mm, 6.2 sec at f/4.6. ISO 200. No post production.
I guess a little back-story is in order for this photo. Anya does a lot of card making with rubber stamps - you can visit her blog for more detail and examples. Well, she is on what is called a Design Team for a stamp company called Waltzing Mouse Stamps, and basically they make cards and crafts with the company's stamps to help promote their products. Well, a few months back, they released a set of stamps with spooky Halloween style labels, so Anya ran with it and created a bunch of labels to put on bottles.
This then ended up turning into a full blown photo shoot setup. We experimented with multiple light sources - candles, small LED lights, small lamps, etc. We probably spent close to an hour trying different combinations and different angles and configurations of the bottles. We experimented with adding fake cobwebs and various props (yes, we actually do have a deer skull around the house - a couple actually... Anya has found them while out doing her field work). It was definitely the first time I did anything like this, and to be honest, it was kind of fun.
In the end, our efforts definitely resulting in a bunch of rather spooky looking photos. The owner of the stamp company really enjoyed them and used several of them to showcase the products on their site - that's probably the closest my photos have come to being published, so not too shabby. ;)
Anyway, have fun trick-or-treating, and definitely avoid anything that looks like it came from the shot above.
- Bill
TTV Sea of Purple Flowers
ktuli — Sat, 10/30/2010 - 07:47
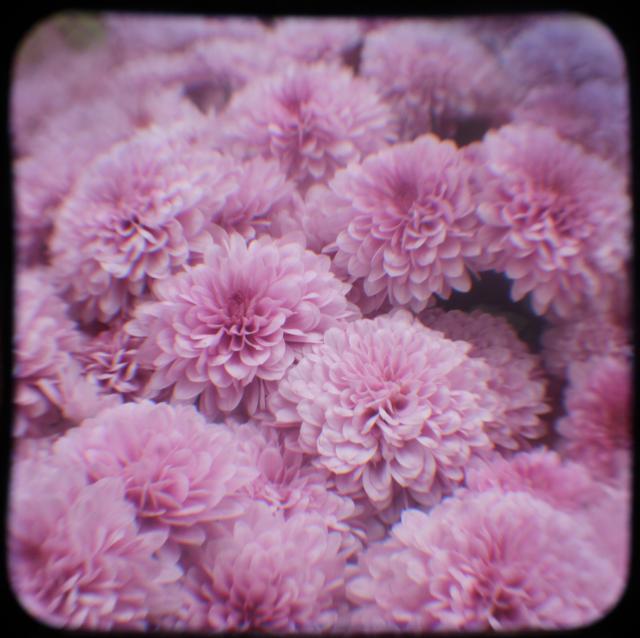
I really liked this photo the moment I framed it, and I was very pleased it came out as nicely as I had envisioned.
Technical Data: Canon EOS 7D TTV Argus Seventy-Five, Tokina AT-X M35 Pro DX AF 35mm f/2.8 Macro 1:1, 1/12 sec at f/11.3. ISO 200. Monopod and handheld. Cropped in Photoshop Elements 8.0. Phipps Conservatory.
Why This Photo: Even while working on this TTV photography, I still couldn't resist the urge to fall back on my favorite form of photography - macro. This mass of purple flowers just worked great to get close and fill the frame with the repeating pattern of the flowers.
What Works: The focus is spot on even through the Argus Seventy-Five's viewfinder. The distorted edges does a great job of blending the pattern of the flowers right out to the edge of the frame. And the colors and exposure levels are perfectly matched to what I actually saw through the viewfinder.
What Doesn't Work: The biggest thing I missed in this shot are the two dark spots between a couple flowers because they broke up the pattern, and the same holds for the small light spot in the upper left corner. The smaller dark spot and the light spots at the top could probably be ignored, but the larger dark spot is somewhat distracting.
Oddly enough, this shot lacks any of the dirt specs that exist in a lot of the other photos. There must be something with the focal distance of the subject that causes those specs to be visible or not.
But like I said, I really like this shot. The simplicity of the shot is juxtaposed by the intricacy of each flower, allowing the viewer to just get lost in the frame - or at least I think so.
- Bill
Poll: TTV Exposure
ktuli — Fri, 10/29/2010 - 13:36
Ok - I mentioned this in a couple of the previous TTV posts, but I seem to prefer a darker or slight "under" exposed shot with this TTV photography. I can't quite put my finger on it, and so I thought I would put it out there to you guys for your opinion.
|
|
|
|
|
|
Technical Data: Canon EOS 7D TTV Argus Seventy-Five, Tokina AT-X M35 Pro DX AF 35mm f/2.8 Macro 1:1, 1/6 and 1/12 sec at f/8. ISO 200. Monopod and handheld. Cropped in Photoshop Elements 8.0. Phipps Conservatory.
Usually I don't share my choice early on, but like I've said - I definitely like the darker exposure. Vote below and then leave me a comment and let me know why you liked the one you did.
And of course, tune in tomorrow for more TTV goodness.
- Bill
TTV Model Train and Orchids
ktuli — Thu, 10/28/2010 - 18:51
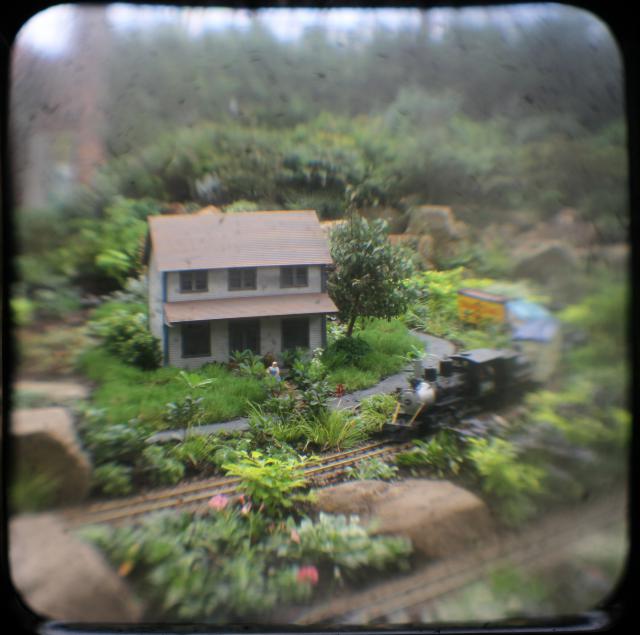
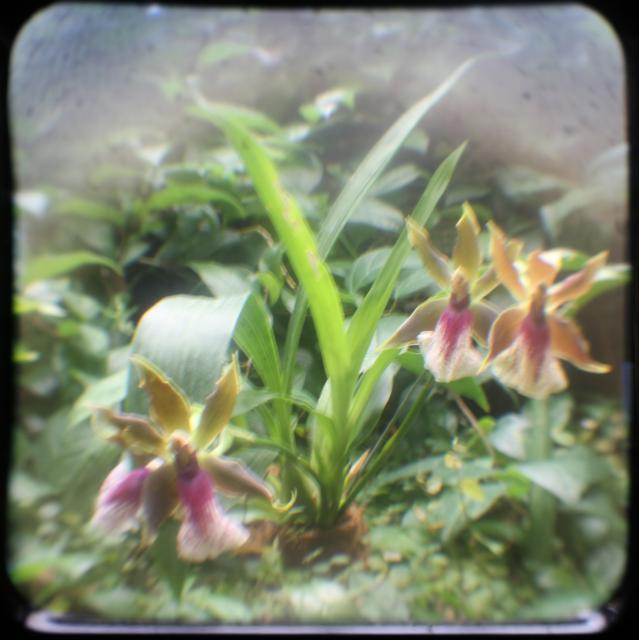
Ok - as promised, no lengthy discussion about the details of TTV photography. We'll take a look at two recent TTV shots, and go through my usual critique of them.
Technical Data: Canon EOS 7D TTV Argus Seventy-Five, Tokina AT-X M35 Pro DX AF 35mm f/2.8 Macro 1:1, 1/50 sec at f/4. ISO 200. Monopod and handheld. Cropped in Photoshop Elements 8.0. Phipps Conservatory.
Why This Photo: The model railroad display at Phipps made for many opportunities that begged for the TTV vintage treatment, this shot would probably look incredibly flat and boring with regular photography, but pops with TTV.
What Works: The focus hits right on the house and the front of the engine of the train. With the distortion of the viewfinder, getting this right isn't always as easy as with a regular shot. The distortion and blurred edges almost allows this shot to be mistaken for a real scene as opposed to a miniature setup.
What Doesn't Work: This exposure is a little bright for my tastes with this style of photography, and the blown out hot spots along the top are a bit distracting. The area of focus may have been better suited if it were shifted slightly to the right to get more of the train in focus.
Technical Data: Canon EOS 7D TTV Argus Seventy-Five, Tokina AT-X M35 Pro DX AF 35mm f/2.8 Macro 1:1, 1/2 sec at f/8. ISO 200. Monopod and handheld. Cropped in Photoshop Elements 8.0. Phipps Conservatory.
Why This Photo: I liked the idea of old style photos of flowers - almost as if I was out on an expedition back when this Argus camera was just released and exploring and photographing this flower for the first time. I know - I have quite the imagination.
What Works: I love the balance the flowers give with two on one side and one on the other, and the colors really pop in this shot.
What Doesn't Work: The shot is way too over-exposed, and that is unfortunate because the long shutter speed of 1/2 second definitely added to the blur and lack of focus in the shot. Though the colors are nice, they're probably washed out because of the over exposure. The framing of the shot may have worked better to move the orchids up a little in the frame and reducing the empty space towards the top.
I still am just so pleased with this "new" style of photography, and am definitely looking forward to heading back out with this rig. But I do have a good handful more photos from this trip to Phipps, so I'll continue sharing them (I think I still owe you for that sleeper of a post yesterday! ;) haha!)
What do you think? Are you a fan of this TTV stuff? Drop me a comment and give your own critiques of the technique and these photos.
- Bill
What is TTV? And how do I do it?
ktuli — Wed, 10/27/2010 - 20:37
Ok, so I've been showing off this TTV photography, but what does that mean?
TTV literally means Through The Viewfinder as the technique is done by using one camera to take a photograph through the viewfinder of another camera. Theoretically, you could use this technique with any two cameras, but in reality, if you tried it with two modern cameras with modern viewfinders, you'd probably be rather frustrated (nor would you get the nice vintage look that most TTV photographers are going for).
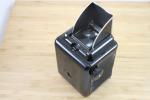
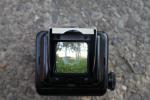
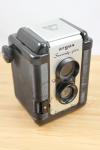 At which point vintage TLR cameras come into play. TLR stands for Twin Lens Reflex (as opposed to modern SLRs - Single Lens Reflex). TLRs - as the name implies - used twin lenses in their construction; one for the viewfinder, and one for the exposure. The TLRs used in TTV photography were waist-level cameras that were designed to be held at waist level and the photographer looked down through a viewfinder at the top of the camera, and with the assistance of a mirror, through the front of the camera's upper lens. Below, you can see my Argus Seventy-Five TLR with the viewfinder cover open, and then a shot looking down through the viewfinder from a distance.
So, to create TTV photographs, you simply line up your modern camera (you don't need an SLR, but of course I recommend one) to shoot down through the viewfinder of the vintage TLR camera. Doing this hand-held is difficult - near impossible. Additionally, you want to eliminate any additional light sources except for what is coming through the TLR's viewfinder so that you get the best possible exposure of your TTV photograph. To do this, you need to build a contraption - yes, as I mentioned before, that is what TTV photographers call the cardboard frame used to merge the two cameras for easier setup of the shot.
Your contraption will differ based one several factors - first, depending on what TLR camera you find (more on that in a bit), and the lens you are going to use on your SLR camera (you can use a compact camera, but from what I have read, it is more difficult). I'll discuss those points in a little bit, but for now, we'll look at the general construction of the contraption.
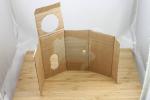 First, you need to measure the outside dimensions of your TLR to build a frame (I used cardboard, but other materials will work if you're looking for something more robust) that will wrap around the outside of the TLR.
Next, you need to measure the height that your contraptions needs to be. This is where the lens you select comes into play. I highly recommend a macro lens if you have one. The reason for this is you want a lens that can focus on the viewfinder of the TLR as closely as possible. You can start out by looking up the specifications of your lens to see what the manufacturer lists the minimum focusing distance as, or you can (and probably should to be sure) measure it yourself. To make the measurement yourself, place your TLR on a table and use your camera to look down through the viewfinder. You want to accomplish two things here - fill as much of your SLR's frame with the viewfinder of the TLR - if you can get it to almost touch the top and bottom of the frame, you're set! (but remember to not overfill and cut off those nice rounded corners of the viewfinder). Once you've got that worked out, measure the distance either from the front of your lens or front of your camera to the table (it helps to have a second person there to do the measuring). The reason I recommend a macro lens is because they generally have a small minimum focusing distance and helps to keep your contraption smaller and more manageable. I used my Tokina 35mm macro since its minimum focusing distance is only 5.5 inches.
The instructions from my book missed a couple suggestions that I found helped. First, give yourself an extra flap to overlap to close the contraption around your TLR - this helps to block light leaking in through a corner. Second, I built my contraption to go all the way to the bottom of the TLR which means when I measured the minimum focusing distance above, I could just measure to the table and not worry about trying to measure to the viewfinder and then add an amount to slide over the TLR. Also, I found that (at least with my Argus) I was able to simply press it against the cardboard to mark where I needed to cut out for the lenses and the film advance knob on the side of the lens.
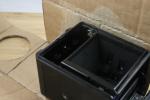 Once you've got that all figured out, the last thing you need to figure out is a top flap to cover the top, which you'll cut a circle opening in for your lens to point through. Measure out your contraption on carboard, cut it out, use a craft knife to cut out the openings for the lenses and any knobs that need to push through (I removed the knob and then replaced it after sliding the cardboard into place - see photo to the right), and score the lines to fold along the corners.
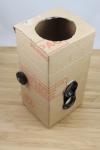 At this point, you can put your contraption on your TLR and try it out. If you're lucky or good, you'll be ready to go... if you're like me, you'll start working on your second contraption because you messed something up on the first one. ;)
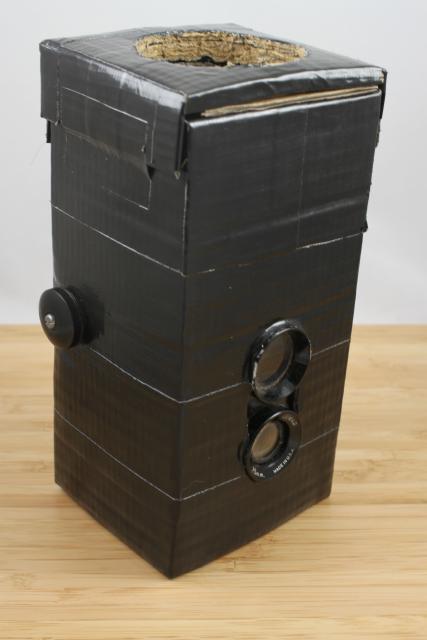 Finally, if you're like me, you'll want to break out the black duct tape and cover your whole contraption in the black tape. This actually does more than just make the contraption look a lot nicer. It helps to add a bit more stability and strength to the cardboard, and helps to block any light from leaking through and making your exposure more difficult. But it really does make it look a lot nicer!
Geez - this really has turned into one long post - I apologize for that, but I really wanted to to be as thorough as possible. Hopefully this has helped and you feel you could use this to get started with TTV photography.
Before I wrap this up, though, I do want to provide a couple more bits of information that will probably be helpful. First, don't spend a lot on your TLR - you can usually find these at flea markets for very little. I went to a single flea market and came home with four different TLRs for a mere $20 total (granted only two of them will work for TTV, but still). Also, since you don't use the exposure lens, the camera doesn't even need to work, so don't spend extra money just to get a camera that is labeled to work - get one that "doesn't work" just to save a few bucks... all you care about is that the viewfinder works. Which is the last point about the TLR - don't clean the camera! Leave that dust and dirt and scratches on the lens and viewfinder - it adds to the vintage look of the photos.
Also, when you are set to shoot, try the following on your DSLR. Use Liveview if you have it - it makes it much easier to compose the shot and see what is in your frame. If you do use Liveview, be sure to take extra batteries as Liveview will chew through batteries quickly. I'd also recommend turning up your auto-power off setting so that your Liveview doesn't turn off right as you're about set to take the photo. Next, if your camera has it, turn off the auto-rotate feature. Since your camera will be pointing down, the sensor that measures what orientation you're in is easily confused, and simply turning this feature off eliminates the photos being rotated when you didn't want them to be. And lastly, I was finding that I needed to "under" expose my shots. This is probably because I was using evaluative metering mode, perhaps try partial or spot metering instead. But if not, I found I was consistently "under" exposing by up to 2 full stops. This helped to give more of that vintage feel, but also made for more reasonable shutter speeds since the TTV generally makes for less light coming through to begin with - I spent much of the day at 1/10th of a second shutter speed.
Again - sorry that this was a very long post. There was just so much information here, and I sometimes get a little wordy. To make it up to you, this does mean that the next couple days worth of posts will be focused on just the photos without having to spend time discussing the details here.
I do hope the details helped though, and if anything at all is confusing, please don't hesitate to post a question in the comments and I'll do my best to explain better!
Tune in tomorrow for more fruits of these efforts.
- Bill

