Bali: Foods
ktuli — Tue, 02/22/2011 - 17:34
So the food in Bali and Wakatobi was fantastic. So I'll share a little bit about that today...
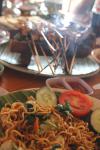
First, on the top left is fried noodles and chicken satay. The fried noodles became a staple for me, as I really loved the flavor and it seemed to be available for breakfast, lunch, and dinner. The chicken satay was a grilled chicken with a peanut sauce. At this particular restaurant, the grilling was finished at the table on a small charcoal grill that they brought to the table - it worked great to keep the chicken warm throughout the whole meal. Almost all of our food was great in Bali (except for when we tried anything semi-American style), and the food in Wakatobi was fabulous every day!
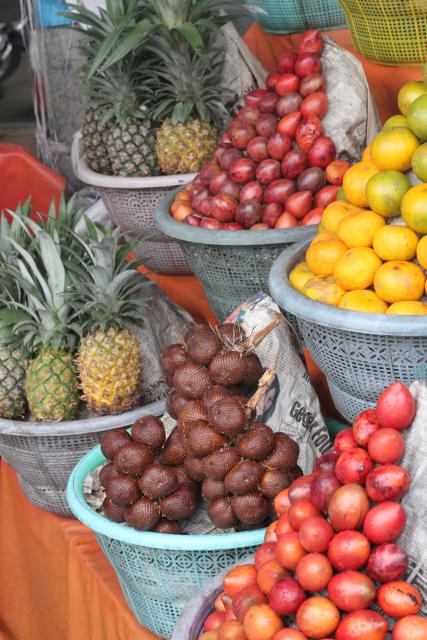
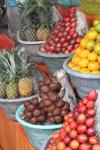
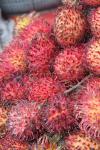
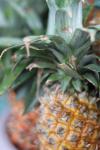
The other major thing was all the fresh fruit we got. I have fresh pineapple, watermelon, honeydew, and other "regular" fruits. There was also several fruits I've never seen before. The second photo on the left is rambutan or hairy fruit. The red "hairy" outer shell would be cut away to reveal a white fleshy, sweet fruit surrounding a large seed inside. To be honest, we also called it "eye-ball fruit" as it had that tendency to look like eyes!
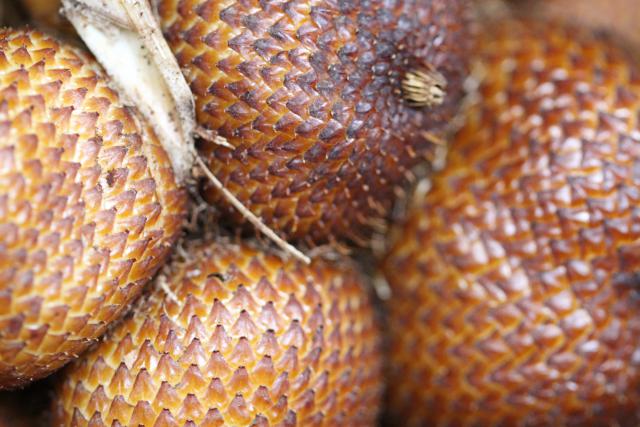
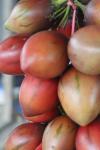
Additionally, in the top photo on the right, you can see a brown fruit in the middle basket on the bottom row. This is salak or snake-skin fruit. This fruit would be peeled and would reveal a kind of fruit with cloves similar to a bulb of garlic, and the flavor and texture was something between an apple and a pear. Very good. Below the vertical shots is a close-up of the snake-skin fruit.
 |
|
 |
 |
 |
|
 |
 |
|
 |
 |
We also visited a farm of sorts. This farm was more of a tourist farm where they would grow a huge variety of the things often grown in Bali, so it had a path through a bit of "jungle" with various plants growing. One thing they had and specialized in was coffee. They had several different kinds of coffee there that they would grow and roast on site. One in particular is Luwak coffee - which is widely considered the most expensive coffee in the world (though, for the life of me, I can't figure out why someone would pay extra for that!).
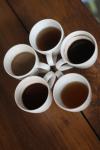
Anyway, the farm owners sold the various teas and coffees they grew there (yes, including luwak), and offered free samples. When they brought us little trays with small cups with the various flavors to try, I don't drink coffee, and I didn't care much for the teas (I must be spoiled with all my sweet fruity flavored teas I drink at home). So,I decided to get a little creative with my photography and arranged the cups in various ways and played with different depths of field to see what kind of artistic shots I could achieve.
I had done a little playing with the depth of field with the fruit shots as well, but found that the deeper depths of field worked best with those to show all the various fruits and their textures in a single shot. At first glance I took the fruit shots for the mix of colors, then decided that the textures were just as important!
Above is the close-up of the texture of the snake-skin fruits.
I miss all the fantastic fresh fruits and juices we got while in Bali and Indonesia.
- Bill
Bali: Batik
ktuli — Sun, 02/20/2011 - 19:56
Well, I don't know if anyone else is tired of the dive photos yet. I'm certainly not, but I figured I'd switch things up a little and bounce back to Bali for a couple posts to give others a break just in case.
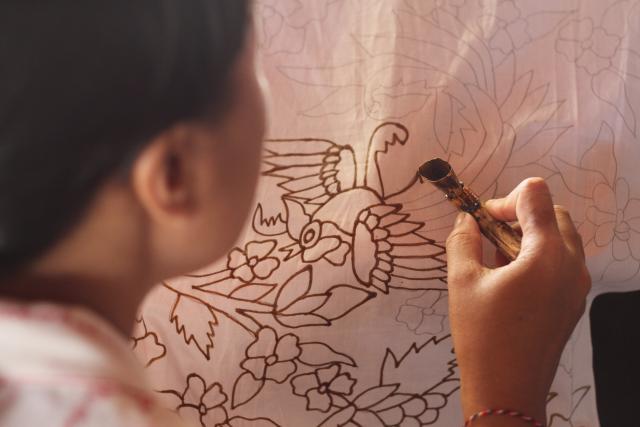
One of the things we did on our second day in Bali was to visit some of the crafts areas. Bali is well known for wood and stone carving, silversmiths, and for a type of fabric called batik. I didn't take too many photos this day, but I did take this one of a woman making batik fabric, and really love it.
Technical Data: Canon EOS 7D, Canon EF 50mm f/1.8 II, 1/60th sec at f/2.8, ISO 500 (auto). No post production
What Works: The composition is strong with the woman's head taking up a third of the shot and her hand resting on one of the other thirds. The balance given to the photo by the darkened drawing offsetting the lighter area of the photo. But really, what makes this photo nice is the shallow depth of field produced by the relatively wide aperture of f/2.8.
What Doesn't Work: Honestly, I find it a bit tough to find anything wrong with this photo. The dark shape in the bottom right is a tad distracting, but really - that seems like nitpicking.
Anyway, I guess I could explain what is going on in this photo.
Batik fabric is made by applying a layer of beeswax to the fabric, then dying it. The wax prevents the cloth from being dyed and is then removed by boiling the cloth. This produces a negative image of the pattern. If a piece of fabric is to have multiple colors, the wax is reapplied again to the other areas and the fabric is dyed again with the subsequent colors. Each process is done by hand by women who use the tool shown here to trace or fill in the pattern with the beeswax.
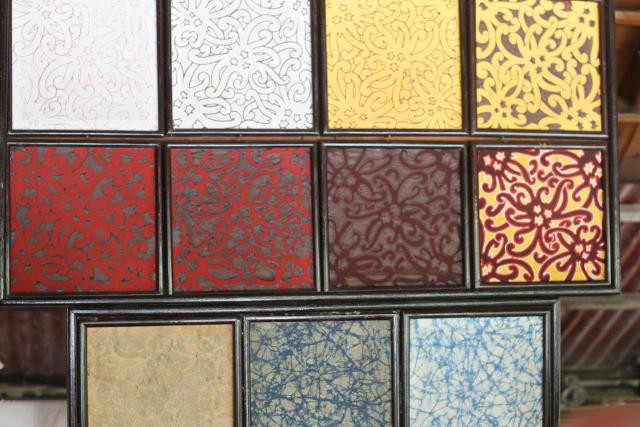
The photo below shows how a two color pattern is created, first from a pencil drawing, to a wax traced drawing, then dyed, then more wax applied, then more dye, etc, etc.
The batik cloth is used often to make sarongs which are worn by Balinese men during temple ceremonies, and by women just about any time. Foreign tourists are required to have their knees covered while visiting temples as well, so sarongs are often available for rent outside of temples. Anya and I purchased some batik sarongs partially as souvenirs, and to have available when visiting the temples. Anya's has a nice flower pattern on it, while mine was printed with a bunch of different sea creatures (of course)!
- Bill
Wakatobi: Blue Ribbon Eel
ktuli — Sat, 02/19/2011 - 09:30
As I mentioned yesterday, Roma was one of my favorite dive sites the entire week. Within 15 minutes of hitting the water, our diver masters had found us a Blue Ribbon Eel (Rhinomuraena quaesita), and the Tiger Mantis Shrimp I showed you yesterday.
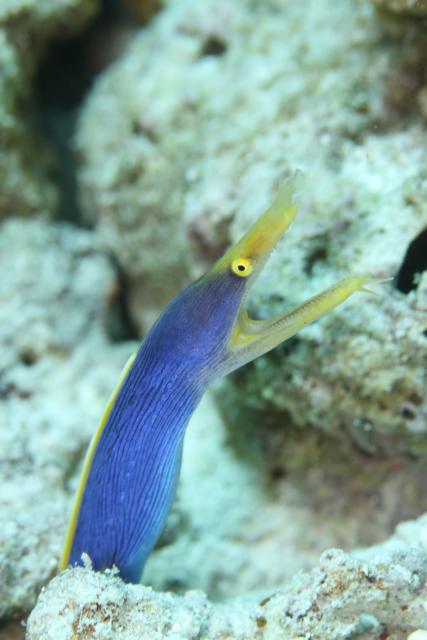 The Ribbon Eel was another critter on my wishlist, and since the brochure for Wakatobi "advertised" that we would see them, it was very nice to not be disappointed. In fact, reviewing the brochure now that we're home, we realize that we saw a majority of what was presented there.
Technical Data: Canon EOS 7D, Canon EF 100mm f/2.8L Macro IS USM, 1/260th sec at f/8. Image Stabilization on. ISO 320 (Auto). Ikelite Housing and Port with Ikelite DS161 Strobe in TTL Mode. No post production.
Why This Photo: Well, let's see... I got certified to scuba dive, saved up for over a year, spent a bunch more for the camera equipment, traveled half-way around the world, all to get to see some of the wonderful creatures I'd only ever seen in nature documentaries and books. I guess I took this photo just 'cause I could.
What Works: The vertical format works well with this subject, and the diagonal line he produces through the shot provides a nice balance. Focus is tack sharp right on the eel's face, and its tiny razor sharp teeth are easily visible. The relatively shallow depth of field produces a softly defocused background to keep the eel as the main subject with minimal distraction.
What Doesn't Work: The black patch on the rock to the right of the eel is a bit distracting, a tighter crop would work better here. Also, the vantage point is still slightly above the eel, a lower vantage point would produce a more intimate image, and perhaps could have made the eel more comfortable with my presence (though I wasn't the only diver sticking a camera in its face!).
Of course, Mike, one of our dive instructors says he's been on dives and seen fields and fields of ribbon eels, but this guy was the first I've seen in person, so he is the coolest ribbon eel I've ever seen.
- Bill
Wakatobi: Mantis Shrimp
ktuli — Wed, 02/16/2011 - 20:18
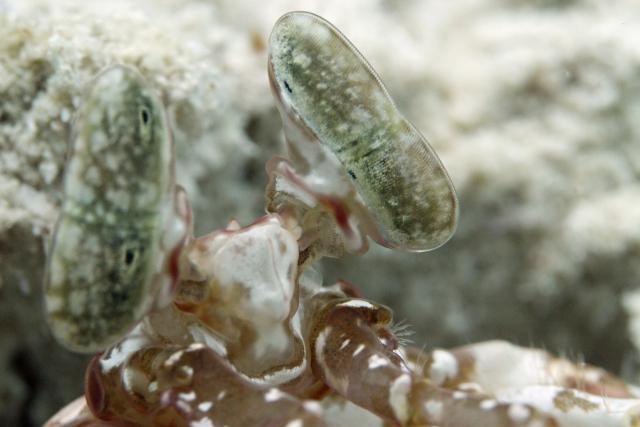
What you see here are a pair of the most complex eyes known to man.
Technical Data: Canon EOS 7D, Canon EF 100mm f/2.8L Macro IS USM, 1/170th sec at f/8. Image Stabilization on. ISO 2500 (Auto). Ikelite Housing and Port with No Flash. Removed Color Cast and Auto-Smartfix in Photoshop Elements 8.0.
They belong to a Tiger Mantis Shrimp (Lysiosquillina maculata).
Mantis Shrimp (not related to either Praying Mantis nor Shrimp) were something I had on my checklist of things I wanted to see on this dive trip. And much like the nudibranchs, I was not expecting how often we would see them. I personally saw three individuals, plus evidence of at least two more, and others in the group saw several more individuals. This individual was seen at my personal favorite dive site at Wakatobi - Roma, which was also were my False Clownfish photo came from, and we also saw a Blue Ribbon Eel, a Leaf Scorpion Fish, Nudibranchs, Spine-cheek Anemonefish, Fire Dartfish, and tons more (but you'll have to stop back for those photos). If someone told me I could go back to Wakatobi and dive only one site the whole week, it would probably be Roma that I'd pick.
Anyway, you might be asking why those eyes are the most complex known to man. If you're not, you read that article I linked up there, and actually understood it all (I certainly didn't!). But the short story is this: they can see a much wider spectrum of light from us (spanning from infra-red all the way into the ultra-violet spectrum!), meaning they can see about ten times the number of colors we can, they can see and filter linear polarized light (we need sunglasses or camera lens filters for that), and some species can even see circular polarized light (also a job for lens filters), and additionally they do not lose depth perception when using only one eye (humans need both eyes for depth perception). Oh yeah, and they rotate independently, stick out from the head (ie: can see around corners), and if my research is correct, can pick up satellite television. Ok, maybe not that last bit, but they're still pretty impressive eyes. Then again, perhaps it isn't as much of an exaggeration after all - an article on Wired.com discusses how the Mantis Shrimp's eyes are being researched to help develop the next new High-Def recording medium (and I haven't even started switching to Blu-ray, and they're obsolete!).
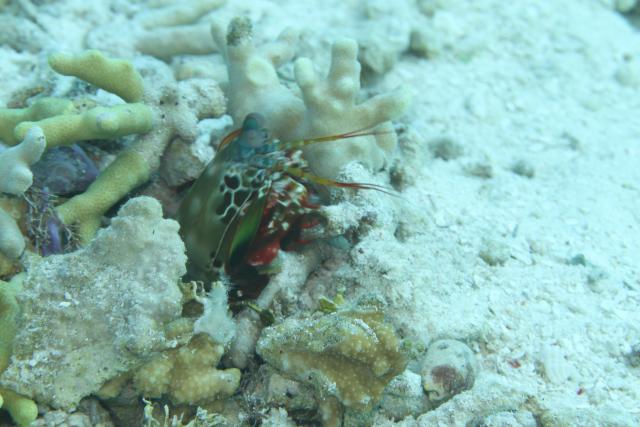
The last guy there is a Peacock Mantis Shrimp (Odontodactylus scyllarus) and is probably considered the more common mantis shrimp. They are sometimes available in the pet trade (and sometimes come into a tank as an unexpected hitchhiker on coral or live rock). They are much more colorful, thus their names.
In fact, I get to take credit for finding that guy on that particular dive (which was at a site called 'The Zoo'). I saw his burrow from about twenty feet away, and quickly made my way there. As I got close, I thought I had seen something duck inside, so I glanced into the hole (literally just a hole in the ground that drops about a foot deep, then branches off to the side) but didn't see anything. So I settled in on the sand and waited and watched. After a few minutes, Brigette (one of our dive instructors) came over and tapped me on the shoulder - which made me jump (I will explain why shortly). She asked what I was looking at, and I tried to explain that I wasn't quite sure if there was anything there or not. But she settled in next to me to wait too. No more than a few seconds later, the Peacock Mantis Shrimp returned to the top of his burrow and did some housekeeping, throwing a piece of broken coral out. I fired off a few frames. I was thrilled, but running low on air, so I passed the camera off to Anya and tried to indicate to her what I had been watching and to get some photos. I must have done a terrible job of explaining what it was, because she said she went over and was looking right down the burrow and trying to figure out what she was supposed to take photos of. Perhaps it was good that she didn't see the Mantis Shrimp, because he probably wouldn't have been thrilled with her getting so close to his burrow.

So why did I jump when Brigette tapped me on the shoulder? Well, as I lay there on the sand staring at this empty hole in the ground, the thought was occurring to me that perhaps the reason it was empty was because the occupant wasn't home. Peacock Mantis Shrimp are roaming hunters, and when they're out of their burrows, they look like the guy to the right (kind of alien, huh?) (Sorry, I did not take that photo - all of the mantis shrimp I saw were in their burrows.)
Still wondering why I might jump? Ok, let me add that some mantis shrimp can grow to 18 inches long! Still not convinced? Let's throw in their hunting styles. There are two styles of mantis shrimp, smashers and spearers. Smashers obviously, as the name implies, simply smash their prey to death; whereas spearers resemble praying mantids more in that they have back-folding raptorial arms they use to impale and hold prey. Still holding out on me, thinking I am a bit too jumpy? How about if I tell you that their attacks have the speed of a .22 caliber bullet - plus are supposed to be able to cause cavitation (causing a voided space in the water, which is then filled, causing a shockwave impact). Having owned a pet store for several years, mantis shrimp were referred to as 'thumb smashers' (I never carried them in my store, but often saw them at distributors). In general, they're nasty little guys. They have the strength to break crab shells, fingers, aquarium glass, and even camera housing lens ports!
Even with all of that, they're still fascinating creatures, and I was thrilled to get to see two different species of them in the wild in their environment, and to bring back photos of both. I look forward to getting even better shots next time!
- Bill
Wakatobi: House Reef Assortment
ktuli — Tue, 02/15/2011 - 19:44
Ok - I'll skip all the blabbering today. Instead I'll just give a nice little assortment of some of the absolutely incredible stuff we got to see just stepping off the beach and diving on Wakatobi's house reef.
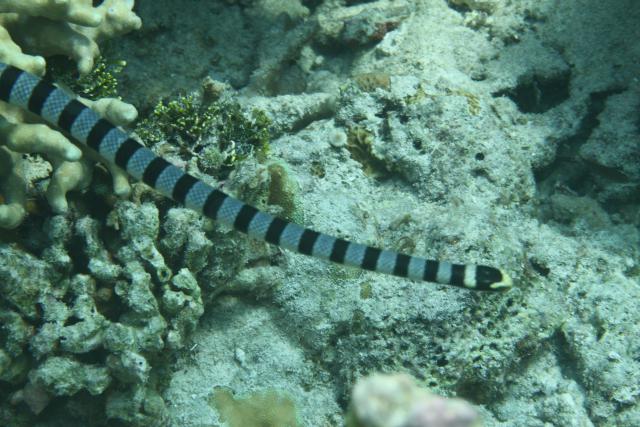
Banded Sea Snake (Laticauda colubrina)
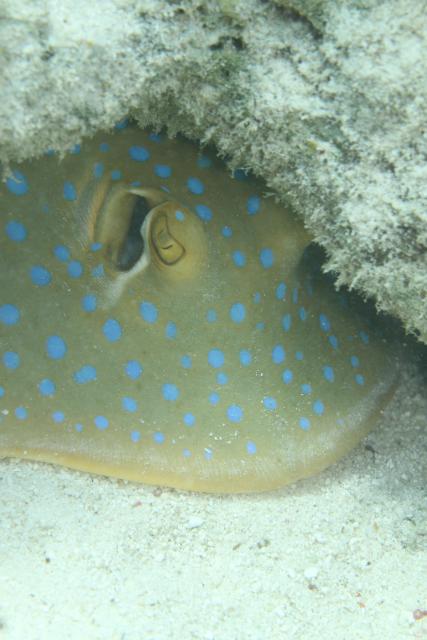
Blue-Spotted Ribbontail Ray (Taeniura lymma)
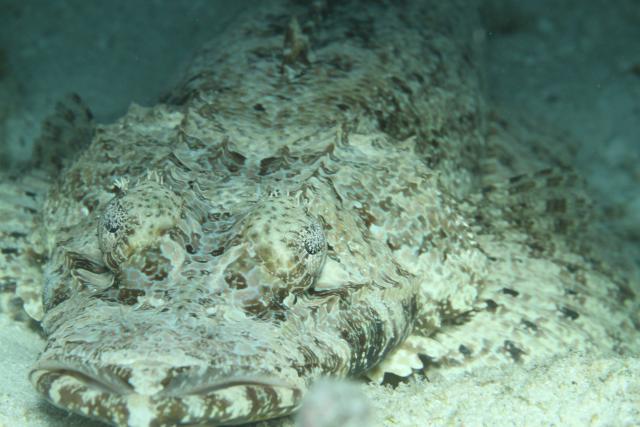
Crocodile Flathead (Cymbacephalus beauforti)
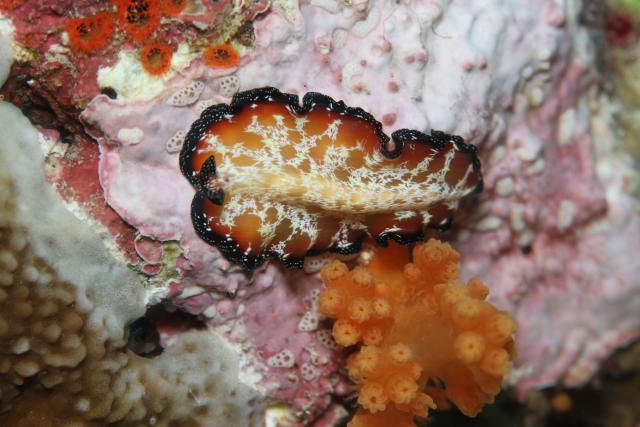
Lightning Flatworm (Pseudobiceros fulgor)
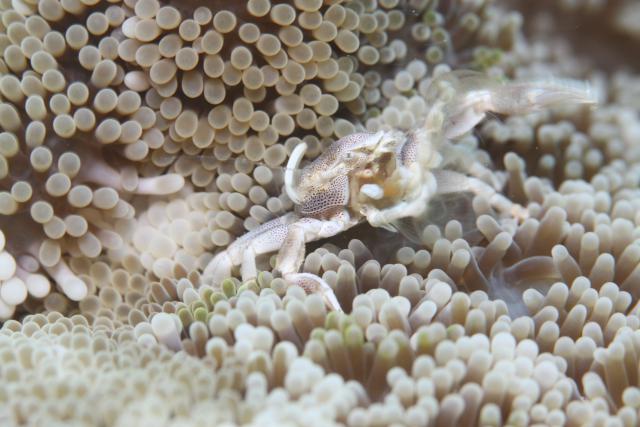
Spiny Porcelain Crab (Neopetrolisthes spinatus)
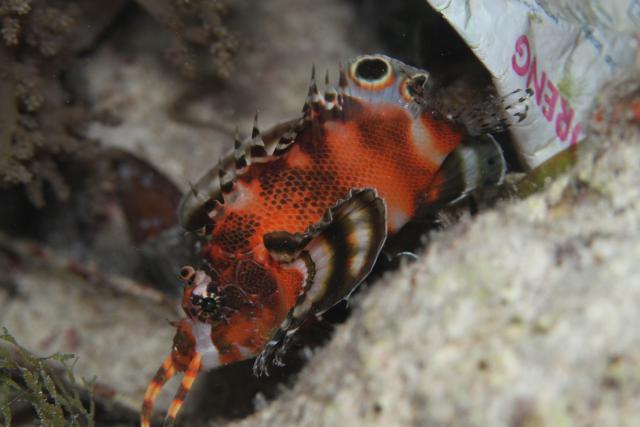
Twinspot (sometimes also Fu Manchu in the pet trade) Lionfish (Dendrochirus biocellatus)
I wish we had had another week that we could have spent just diving the house reef over and over. Perhaps next time!
- Bill
Wakatobi: Photoshopped Lionfish
ktuli — Mon, 02/14/2011 - 19:38
I spent the afternoon fixing up some photos to print so we can frame them and decorate one of our walls with photos from our trip. While I was doing so, I decided to attempt something a little more aggressive.
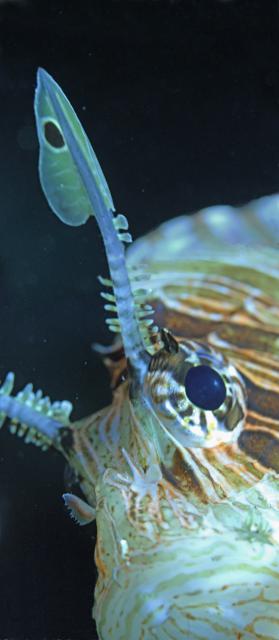
During one of our last few dives, I decided to work in close to one of the Common Lionfish (Pterois volitans). In Cozumel, seeing one of these guys is a very bad thing. They are incredibly invasive and the reef fish in the Caribbean simply aren't ready to compete with them. However, in Indonesia, they are native and thus are in balance.
As I was working with the lionfish, I managed a couple good shots, but afterwards realized that two of the shots had elements that worked individually but I had not managed a single shot with all of the elements combined.
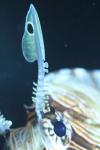
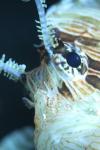
As you can see, the first shot does a great job of capturing that really cool modified "eye-brow" fin but cuts off too much of the face, whereas the second is a good close-up of the fish's face, but is missing the "eye-brow". So I got the idea to combine the two shots to get one single photo with everything. I also decided to stick with the extra long/narrow vertical format it produced.
Unfortunately, the two exposures were slightly different, so there was a lot of adjustments needed to get the colors to match. This required adjusting the colors and brightness and contrast several times - oddly to match the antenna took one batch of changes, while to match the rest of the face took another different batch.
Additionally, the scale of the two shots were also different, which luckily by overlapping some elements, I was able to match things up in that respect. The easiest technique I found for achieving this was to turn down the opacity of one layer and resize and move that layer until things matched up.
In the end, there is still one section that I am not exactly thrilled with how to came out. I'm not going to point out what it is, because I am wondering if I notice it because I sat working on it all afternoon. If you think you know which area still could use some work, drop a comment and let me know.
Technical Data: Canon EOS 7D, Canon EF 100mm f/2.8L Macro IS USM, 1/170th and 1/130th sec respectively at f/8. Image Stabilization on. ISO 1600 and 1000 respectively (Auto). Ikelite Housing and Port with Ikelite DS161 Strobe in TTL Mode.
This is by far the most complex amount of photoshopping I've attempted. Usually I prefer to only make minor subtle modifications, but this little project was fun - I just don't think I'll be doing anything like this too often.
- Bill
Wakatobi: Magnificent Chromodoris Nudibranch
ktuli — Sat, 02/12/2011 - 22:16
Today we'll start looking at one of my favorite subjects from the Wakatobi trip - nudibranchs and flatworms. I knew ahead of time that we would see some, but I was not prepared for how many. If my count is accurate, we saw around 35 different individuals (plus some more that we saw and weren't able to photograph) consisting of up to 15 different species of nudibranchs and 4 species of flatworms.
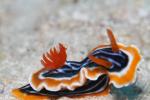
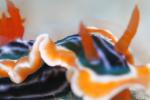
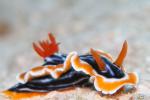
This little guy is a Magnificent Chromodoris (Chromodoris magnifica). C. magnifica can grow to about three and a half inches long, and are carnivores that feed on sponges. But really, they are just beautiful to look at.
At this point in the week, I had figured out some of my problems working with the strobe, and combined with the 8 frames per second burst rate on the 7D, I began to try a new technique for photographing subjects. I would make as slow and controlled of an approach as I possibly could, taking photos the entire way. Doing so would help to control my buoyancy (holding perfectly still in the water is still a bit difficult for me), and thus increase my number of keepers.
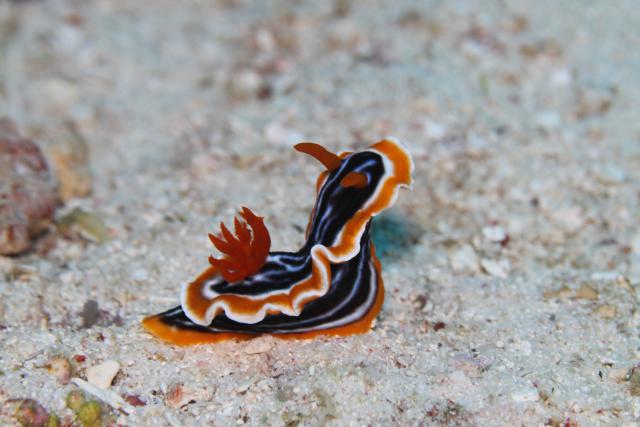
Technical Data: Canon EOS 7D, Canon EF 100mm f/2.8L Macro IS USM, 1/25th, 1/32nd, 1/40th, 1/32nd, 1/25th, 1/16th, 1/5th, 1/10th sec respectively at f/8. Image Stabilization on. ISO 400 (Auto). Ikelite Housing and Port with Ikelite DS161 Strobe in TTL Mode. No post production.
If you mouseover the thumbnails, the larger images will display; progressing through the set will show a bit more of the technique I was describing. There are a couple interesting things to note in the series...
First, you can notice that the earlier shots have a bluish cast to them (since they are unmodified). This is due to the amount of water the light has to travel to make the photo. Even with a strobe such as the Ikelite DS161, any increased distance from a subject will result in a bluish cast. The series makes it very apparent how that color cast goes away as you get closer to your subject and shorten the distance that the light has to travel.
Also, if you look at the second to last shot in the series (the closest one, second from right on bottom) you can see a slight amount of ghosting. The comes from the slow shutter speed of 1/6th of a second and the camera (and me along with it) moving during the exposure. I threw away the shots that were worse, but you can still see it slightly here. This may have been remedied had the camera selected a higher ISO, but that was not the case.
Finally, the last photo being further away from the subject is not a mistake in my ordering them here - that is actually how it was shot. I would also shoot as I backed away from a subject. To do so, I would either place a finger or two on the rock or substrate and push back (you never want to touch coral or most other living surfaces on a reef - both to prevent damage to the reef as well as to avoid injury, remember that most reef creatures have stinging cells called nematacyst) or simply inhale semi-deeply. The second technique is rather interesting and is very effective on slower approaches with no overhanging reef above me. While diving, even changing the volume of air within your lungs can change your buoyancy in the water (and since you're doing that constantly by breathing, it is apparent why it isn't exactly simple for everyone), and I have learned that if I take a slightly larger than normal breathe and hold it for a few seconds, I will slow rise in the water. As I rise, I then exhale to restore my buoyancy to the desired level (and to avoid pulmonary barotrauma).
I know that the majority of folks reading this probably won't benefit from the combination of photography and scuba technique suggestions, but if you ever do decide to try underwater photography, it is worth keeping in mind... ;)
I promise to share more nudibranch and flatworm shots as they were among my favorite subjects for the week. For now, thanks for stopping by, and I hope you enjoyed this magnificent little creature (yes, pun intended!)
- Bill
PS: If you haven't checked out the False Clownfish poll post from the the other day, please do so and cast your vote! If you did already check it out, swing on back as I updated with a photo of the cake the Wakatobi staff presented to me as a 'prize' for that photo!
Wakatobi: Wide Angle
ktuli — Fri, 02/11/2011 - 17:06
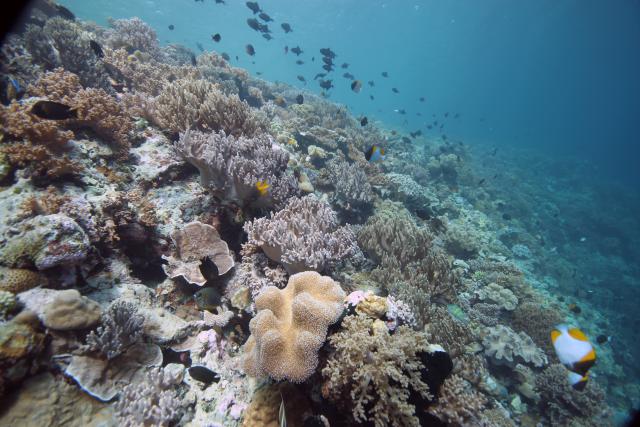
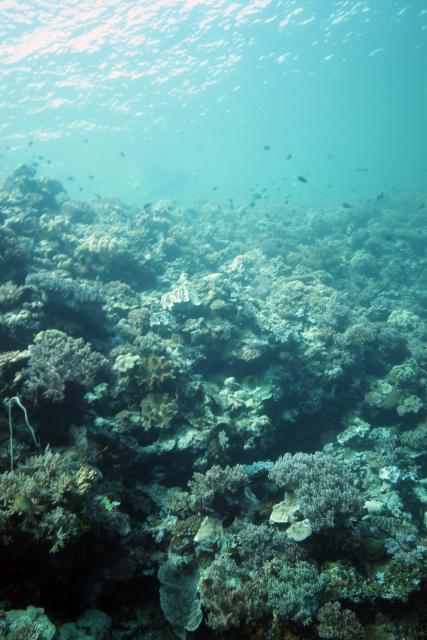
These will be the only wide angle underwater shots I'll be sharing from our Wakatobi trip. With all the macro-life on the reefs there, I simply couldn't bring myself to take the 100mm macro lens off my camera. I didn't feel I was getting great wide angle shots, and I was having too much fun with the macro stuff to try more.
Technical Data: Canon EOS 7D, Sigma 10-20mm f/4-5.6 EX DC HSM at 10mm, 1/100th sec at f/5. ISO 100 (Auto). Ikelite Housing and Port with Ikelite 161 Strobe at full power. Modified version auto-color-correction in Photoshop Elements 8.0.
Technical Data: Canon EOS 7D, Sigma 10-20mm f/4-5.6 EX DC HSM at 20mm, 1/32nd sec at f/5.7. ISO 100 (Auto). Ikelite Housing and Port with Ikelite 161 Strobe at full power. Modified version auto-color-correction in Photoshop Elements 8.0.
Mouseover the images for the originals. All in all, there isn't much to talk about with these shots - they're far from special - something I will have to try working on next time we go diving (unless there's enough macro life to work with again!).
One thing I will say about Wakatobi's reefs at this point is that before this trip I really didn't have an appreciation for the term coral garden. Almost every dive was what is called a wall dive, which is (as the name implies) a vertical wall where all the corals and life grow. At the end of most of those dives, we would surface up onto the level area above the wall (usually in about 10-15 feet of water), and there you would just see corals of every variety spreading out as far as you could see. It truly was beautiful, and I am a bit disappointed that I didn't do a better job of capturing a photo to show that to others.
I guess I just have to go back and try again....
- Bill
Bali: Barong, Temple, and Elephants
ktuli — Thu, 02/10/2011 - 20:36
It looks like we're sticking with that vertical format for today's photos... I tend to try using that format often, but for whatever reason, I used it to great extent during the trip.
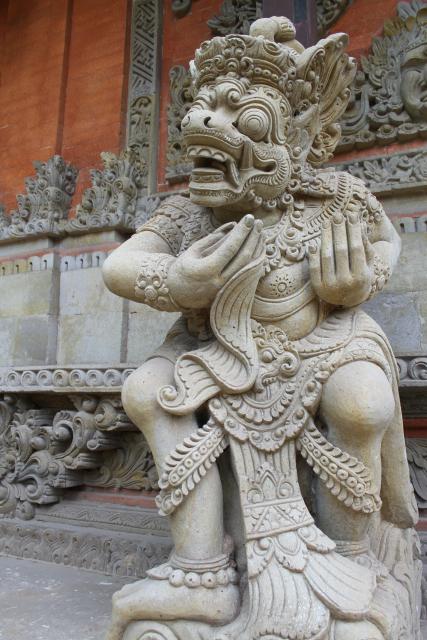
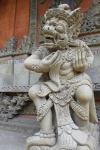
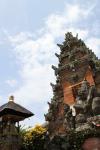
Today's set comes from our second and third days in Bali. First, we have a Barong costume. This was from a Barong Dance that we attended. Barong is the king of the spirits and protects Bali from evil. After the dance, we went to visit another temple - Pura Desa Batuan. Pura Desa Batuan is actually two separate temples, and the grounds have a great deal of statuary. We also visited several areas to see different Balinese crafts, but I'll save that for another day.
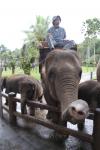
The third day, we visited the Elephant Safari Park where we got to ride an elephant through the jungle.
|
|
||
I like the feel of the photo of the statue (second from top on left), with the just slightly blurred background showing more of the intricate stone carving without being distracting, plus the placement of the statue covering two thirds of the frame provides a nice balance to the photo.
Whereas the first photo of the temple (third from the top on left) is very symmetrical and is generally just a record shot, the second photo (bottom on left) provides a much more dynamic vantage point, and adds a feeling of drama to the scene. I do regret not including a tiny bit more temple and a little less sky in the shot, but I do certainly like how the darker exposure makes for a much more moody feel to the second photo as well.
For the elephant reaching towards the camera (second from top on right), I shot in rapid burst mode while holding a bit of food for the elephant below the camera. As the elephant reached for the treat, I snapped away. I have an entire series of shots from that, but this one was definitely the best. Unfortunately with the overcast sky and bright conditions, the photo is over-exposed (which seemed to be a typical problem for many of the shots from the trip, and I wasn't paying enough attention to fix it - shame on me!).
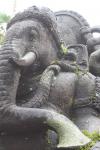
Lastly, the elephant statue (bottom on right) shot was taken by Anya, and despite it being over-exposed (again, my fault for not adjusting the camera's settings for the conditions), I absolutely love the perspective produced by this shot. Everything in the shot is placed perfectly in the frame, and the exaggeration of the elephant's trunk helps to contribute to it being a nice line to lead your eye through the shot.
Drop me a comment and let me know what you think, and be sure to tune in again soon as I'll be starting into the underwater photos from Wakatobi!
- Bill
Bali: Uluwatu Temple & Kecak Fire Dance
ktuli — Wed, 02/09/2011 - 21:03
I'll be deviating from the normal method of doing things for the photos from this trip. There are far too many photos and too much background information for each photo to try posting them individually. The posts will likely be longer than normal, but will likely contain more photos and less technical discussion (though there will still be some - this is a photography site after all!)
Our trip began in Bali, Indonesia after a total of 28 hours of travel time and a 13 hour timezone adjustment. We got into Denpasar in the wee early morning hours on Jan 22nd, made our way to our hotel - the Puri Santrian resort (perhaps more on that in another post) - and crashed for a few hours. We spent the morning and afternoon lounging around the hotel, some folks hopped into the beautiful pool, while Anya and I strolled the grounds taking photos (of course!).
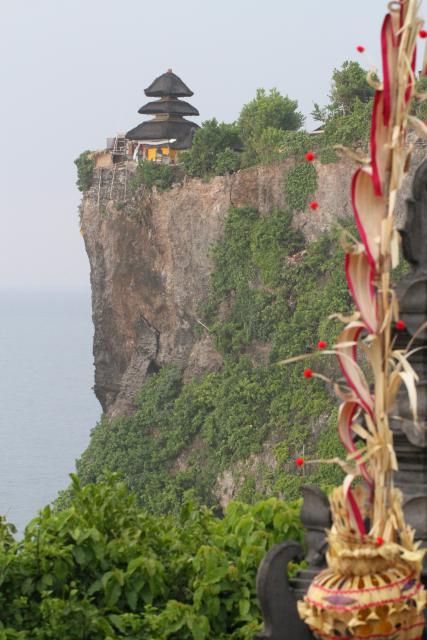
Towards late-afternoon, we headed off to the beautiful Uluwatu Temple (Pura Luhur Uluwatu). Uluwatu is a directional temple in Bali's south-west region which is meant to guard Bali from evil spirits. The temple sits up at the very edge of a 250 foot cliff that overlooks the Indian Ocean.
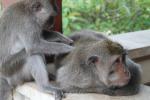
One of the major residents of the temple are monkeys. And apparently, these are thieving monkeys. The general setup is this: Tourists come, monkeys steal stuff from tourists, tourists buy fruit from vendors, tourists bribe monkeys with fruit to get their stuff back. Luckily we didn't have anything stolen, though Brigette apparently almost lost a fistful of hair when a monkey attempted to steal her hair band.
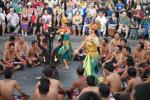
After visiting the temple and taking in the view from the cliffs, we proceeded to the Kecak Dance (or Ramayana Monkey Chant, or Fire Dance) nearby. The Kecak Dance is kind of interesting as it was basically invented by a couple westerners as a way to present some Balinese culture in a way that would appeal to westerners' limited tastes.
As usual, mouse over the thumbnails for the larger image to display.
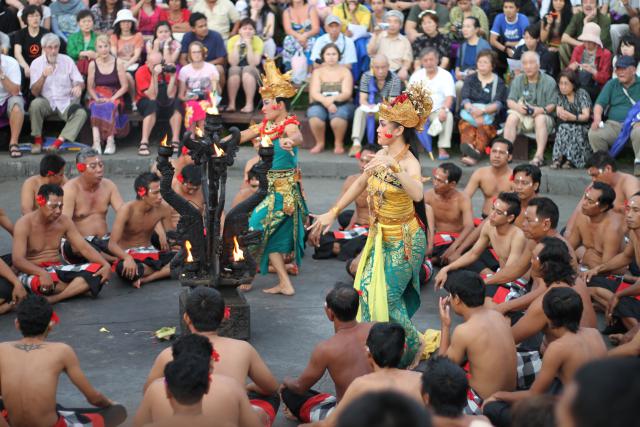
The dance consists of a circle of men who chant all of the "music" for the dance (visible in the shot second from the left above). They repeat a few sounds over and over, sometimes alternating sounds between different sections of the group. There are no musical instruments or spoken words to the story depicted in the dance, so the chanting provides the rhythm and marks the important events in the story.
At the end of the dance, they set up a bunch of piles of what I thought was shredded coconut husks and set them on fire, and the monkey character then gets to kick them around (as depicted in the shot to the far right). It wasn't quite what I expected when I was told we were going to a "fire dance" - I think I was thinking of something more Hawaiian with a guy twirling a flaming baton, but this was still entertaining and impressive.
For the dance (and whole trip), I was limited in the lenses I was able to use. I switched between the Canon EF 50mm f/1.8 II and my new Canon EF 100mm f/2.8L Macro IS USM. I wanted the wide apertures (f/1.8 and f/2.8) to help with faster shutter-speeds given the twilight and then dark conditions. Also during the dance, I switched to automatic ISO mode, to allow the camera to select higher ISOs to also allow for faster shutter-speeds. I found that I took a good deal of photos in a vertical orientation (see below) as a way to both capture more of the character's full costume as well as a way to eliminate clutter and unnecessary elements (ie: spectators). If you're interested in any of the specific technical data for any shots here, simply post a comment and I'll provide them.
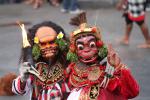
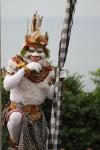
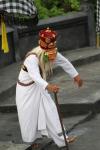
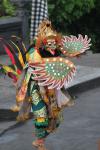
I am not going to go into the roles of each character, but provide some photos of each. Above there is a photo with two characters who basically provided comic relief, and I swear the one looks like Predator! Others include the Monkey, a bird of some sort, and others (see below). The costumes were really interesting, and you can see my usage of the vertical format to be able to isolate a single character.
 |
|
|
 |
||
 |
||
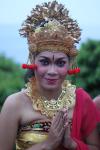 |
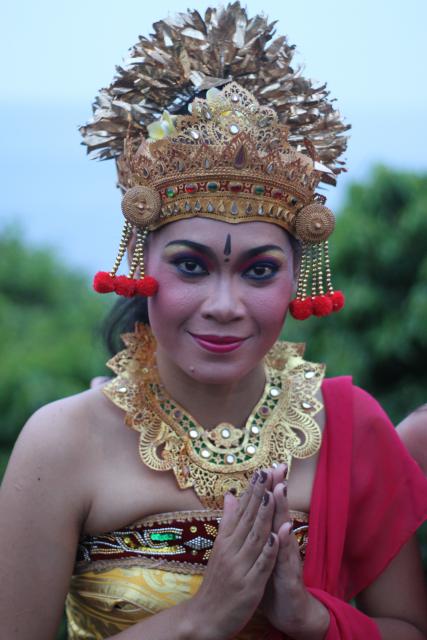
The last photo there - of the one female dancer - is Anya's favorite of this set. The wide aperture (f/1.8) on the 50mm lens used provides the nice soft background. Additionally, the vertical format allowed me to isolate the woman in the shot while she was flanked by tourists, all pushing to get their own photos alongside the performer.
Given the dim lighting and general disarray and constantly moving subjects, all of these shots came out fantastic. So remember the lessons here. Shorten your exposure time (faster shutter speed) as much as possible by (1) using as wide of an aperture as possible, (2) if your camera works well at high ISOs, switch to auto-ISO mode. Additionally, remember that sometimes the vertical format will help you to eliminate distracting elements from your photos, so rotate the camera and see what you can get.
- Bill

