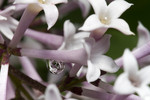
Some More TTV
ktuli — Tue, 10/26/2010 - 21:15
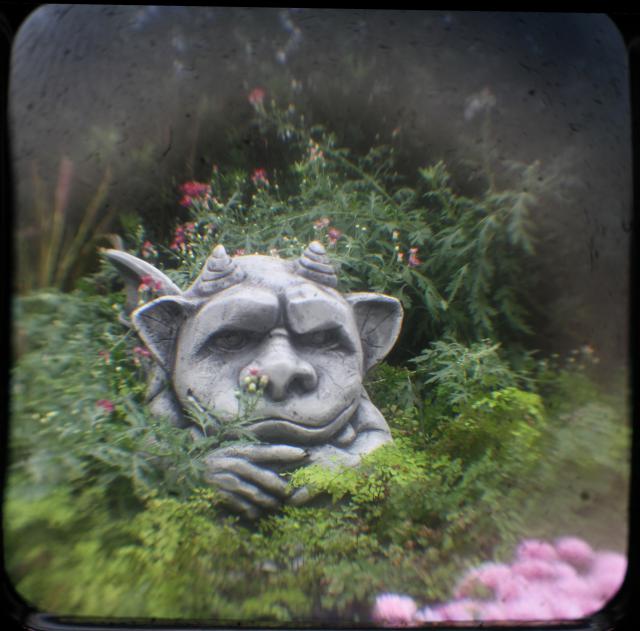
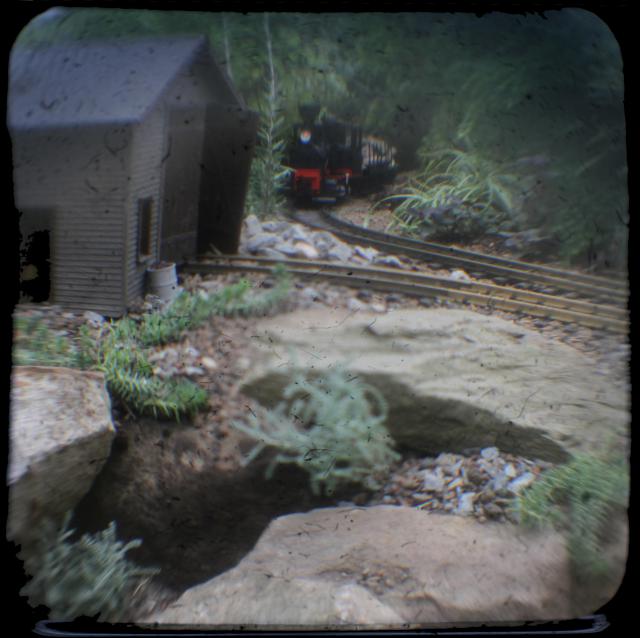
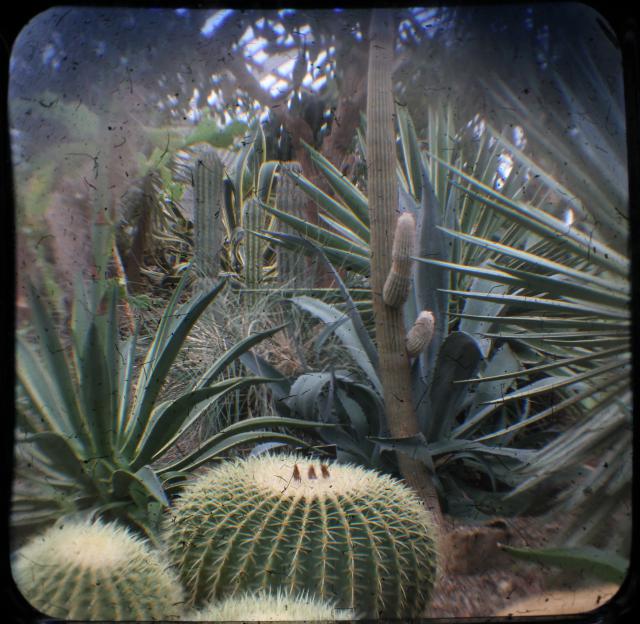
I apologize for not getting a post in yesterday - between uploading the photos and then starting to crop them and then heading to my photography class, I just didn't have time to post. However, I finished the rest of the cropping tonight, and will give you a couple more samples of TTV goodness, and then tomorrow I'll try and get some real posts written.
Technical Data: Canon EOS 7D TTV Argus Seventy-Five, Tokina AT-X M35 Pro DX AF 35mm f/2.8 Macro 1:1, 1/25 sec at f/6.4. ISO 200. Monopod and handheld. Cropped in Photoshop Elements 8.0. Phipps Conservatory.
Technical Data: Canon EOS 7D TTV Argus Seventy-Five, Tokina AT-X M35 Pro DX AF 35mm f/2.8 Macro 1:1, 1/40 sec at f/5.7. ISO 200. Monopod and handheld. Cropped in Photoshop Elements 8.0. Phipps Conservatory.
Technical Data: Canon EOS 7D TTV Argus Seventy-Five, Tokina AT-X M35 Pro DX AF 35mm f/2.8 Macro 1:1, 1/21 sec at f/9.1. ISO 200. Monopod and handheld. Cropped in Photoshop Elements 8.0. Phipps Conservatory.
The last one was shot by Anya, and after I let her have the rig, I didn't get it back the rest of the day... it is just that much fun to do this kind of photography.
Tomorrow, we'll take a look at how to build the contraption and discuss more details about what exactly all this is.
Stay tuned!
- Bill
Intro to TTV
ktuli — Sun, 10/24/2010 - 21:57
I know I've been a bit secretive on some projects I have in the works, but today I'm really excited to start discussing one of those projects.
So let me back up a little bit. A few weeks ago, I was at a Barnes & Noble and saw a book titled 50 Photo Projects. I came home, went on Amazon, and found it and a couple other books - including Camera Creative.
In the latter book, the author - Chris Gatcum - discusses 52 different interesting photography projects. Number 17 is TTV Photography - or Through The Viewfinder photography. In short (don't worry, I'll blabber on and on in much more detail later), this means that you're taking photographs through the viewfinder of another camera.
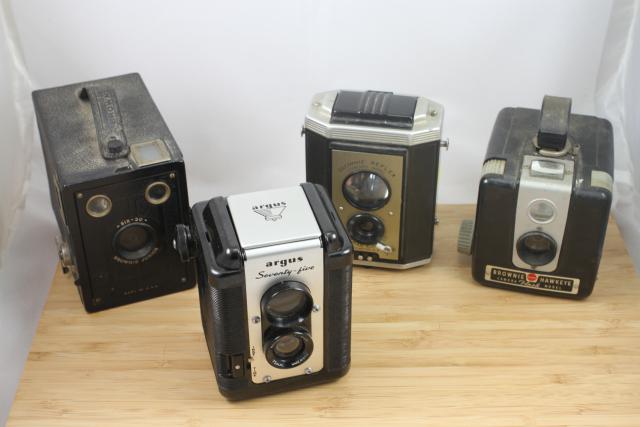
So a few days later, we ventured out to a nearby flea market to see if we could find one of the vintage cameras necessary to try this out. We came home with the following batch...
Across the back row (from left to right), we have a Brownie Six-20 Brownie Junior, a Brownie Reflex Synchro Model, and a Brownie Hawkeye Flash Model. In the front row, we have my current favorite - an Argus Seventy-Five. Oh - one of the most awesome parts of this... I scored all four cameras for a total of $20! (not kidding!)
I think that only the Argus and the Brownie Reflex will work for the TTV Photography, and I'll get into the how's and why's and what's of TTV Photography over the next few days. For now, I'm just going to wet your appetite with a shot I took tonight after getting my first contraption built. Yes, that is what TTV photographers generally refer to the (typically) cardboard frame you build so you can use a new digital camera to take photos through an old TLR camera - don't worry, like I said, I'll get more into all of this in the coming days.
For now, check this out...
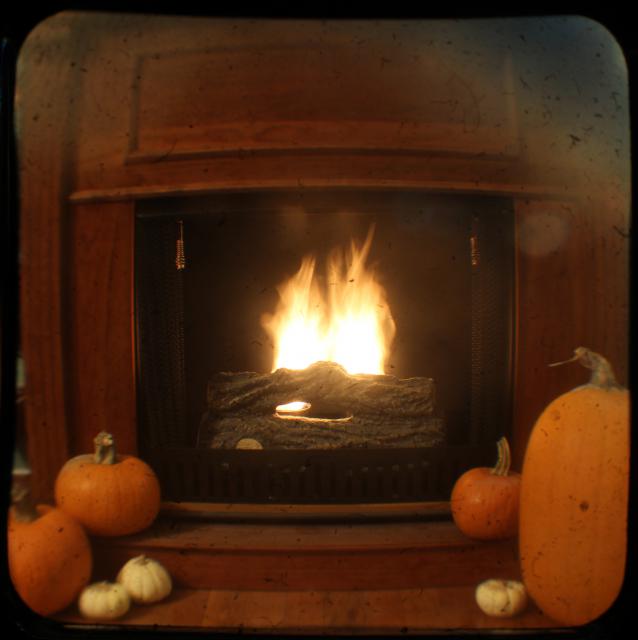
Technical Data: Canon EOS 7D TTV Argus Seventy-Five, Tokina AT-X M35 Pro DX AF 35mm f/2.8 Macro 1:1, 12 sec at f/12.9. ISO 200. Tripod and monopod mounted. Cropped in Photoshop Elements 8.0.
Except for cropping the photo to match up with the Argus's square format, that photo is straight off the compact flash card. I know your first instinct is to say it was completely photoshopped to give it that vintage look, but that is what TTV photography is all about! Instant vintage. I just love it all - the grainy image, the rounded corners, the distorted edges, the vignetting - all without photoshop.
We're headed to Phipps tomorrow specifically to see what kind of shots I can get with this awesome new setup, and if that photo above is any indication, I think there will be a lot of cool new photos to share here this week.
Stay tuned! Or better yet, drop me a comment and let me know what you think of this "new" type of photography.
- Bill
Fisheye view of a Tree
ktuli — Sat, 10/23/2010 - 20:12
Last weekend, my friend, Tom loaned me his Sigma 10mm Fisheye lens. So we decided to take a trip out to Ohiopyle.
I have always found trees to be very intriguing - yet almost impossible - subjects. There is just something about photographing trees that I struggle with, but I keep trying. In fact, I have some specifically tree photo projects simmering on the back burner, so hopefully some day they'll see the light of day and I can share them here.
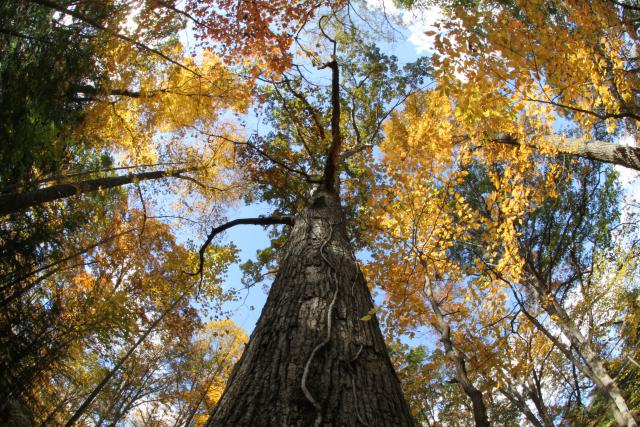
In the meantime, let's look at this tree through a fisheye lens...
Technical Data Canon EOS 7D, Sigma 10mm f/2.8 EX DC HSM Fisheye (borrowed), 1/12 sec at f/22.6. ISO 200. No post production. Ohiopyle, Fayette County, PA.
Why This Photo: As I said, I am intrigued by photography of trees, and I like this perspective giving the full feeling of the size of the tree. Also, using the fisheye lens, gives a very interesting perspective with the surrounding trees. When I saw this tree off the side of the trail, I knew it was worth trying to shoot.
What Works: Despite ignoring the rule of thirds and placing the trunk of the tree dead center, I like this layout composition. Also, though the distortion of the fisheye is constant in the frame, the placement of the surrounding trees actually does a good job of making it appear offset slightly to the top of the frame.
What Doesn't Work: The lighting was tough with fairly quick moving clouds shifting the brightness of the scene repeatedly and with little warning - thus the frame is not evenly lit and the colors are not as nice as they could be. Also, I wish there was more variety in the colors in the leaves, but then again, I guess I don't get much control over that.
Unfortunately, I had another shot I really wanted to get on this trip with this lens. I don't want to give away the details because I have a whole project I want to try and start up that is related, so I'm going to be a little vague here. But there is what I would call an iconic subject out on Route 51 that I wanted to photograph only to find it was covered with some very offensive graffiti. I knew there was graffiti, and that was part of the attraction to it - I was hoping that it would help to make the photo more engaging, so you can imagine my disappointment. I am still hopeful to eventually figure out a way to get the photo I planned without the offensive elements, and then I'll have to borrow that fisheye lens again.
- Bill
Offset Orchid
ktuli — Thu, 10/21/2010 - 19:54
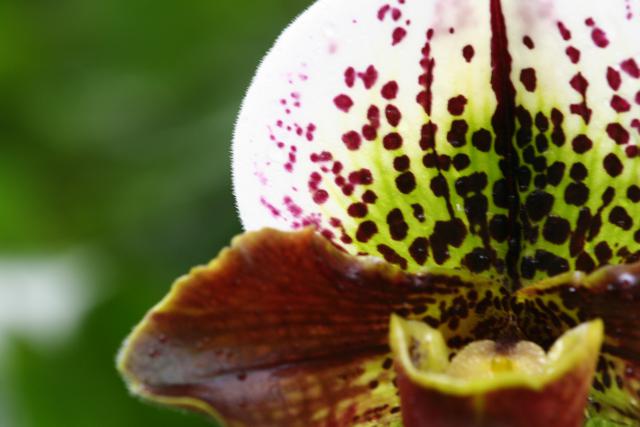
Another thing I do when I'm struggling is let you do the critique work... so drop me a comment and let me know what you think about this one.
Technical Data: Canon EOS Digital Rebel XT, Tamron 180mm f/3.5 Di SP LD 1:1 Macro, 1/8 sec at f/7.1. ISO 400. No post production. Phipps Conservatory, Pittsburgh, PA.
Giraffe Closeup
ktuli — Wed, 10/20/2010 - 20:59
Alright, having a rough week, and not doing so great being inspired for what to discuss. I do have a new project I need to start working on, but more on that later.
Sometimes, when I am not getting that inspiration, I rely on an episode of "What Hangs on Our Walls at Home". This one hangs upstairs in the set of zoo photos in the office.
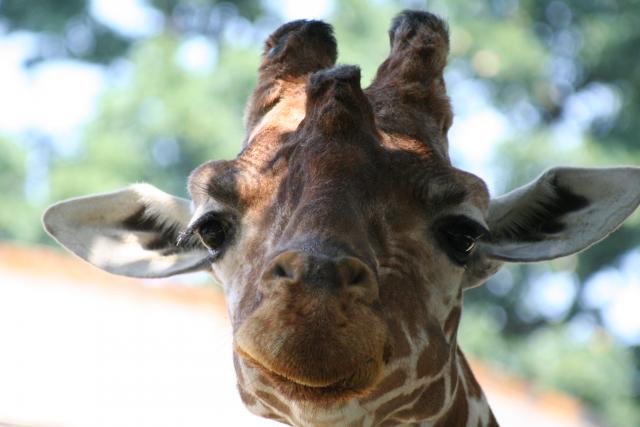
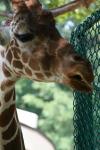
Technical Data: Canon EOS Digital Rebel XT, Canon EF 80-200mm f/4.5-5.6 II at 200mm, 1/250 sec at f/7.1. ISO 400. No post production. Maryland Zoo, Baltimore, MD.
Why This Photo: I simply liked the direct shot of the giraffe's face - not an angle you can usually get, but because of the layout of this zoo, and some creative position, this shot worked out.
What Works: Like I said, the framing of the shot has a nice feel to it, seemingly engaging the giraffe's attention. The beautiful bokeh in the background keeps the focus on the giraffe and not on some distracting element behind it.
What Doesn't Work: The lighting isn't exactly perfect with both a strong side-light plus dappled like through an overhead tree. Perhaps waiting till the giraffe moved slightly would have worked, or maybe some fill flash (though I think I was too far away for fill flash to work). Also, the ear breaking the edge of the frame on the right side is one of my regular mistakes that I'm working on improving.
Shots in zoos are always challenging. I like to try and eliminate as many signs of the enclosure as possible - though I still come home with a ton of photos just for the sake of taking them. I think as I progress as a photographer, I am becoming pickier about what I capture, but I still like some of these older shots. They help to show how I've come along from those early days of automatic settings and plenty of flaws.
Perhaps some day I will have the money and time to go on safaris to get photos like this in the wild, but until then I still enjoy visiting zoos and coming home with photos like this.
- Bill
Photo Book List Updated
ktuli — Tue, 10/19/2010 - 19:30
I don't know if you've noticed, but to the right, there is a link to Photography Books. Something I collect more than camera gear is photography books (probably because they're cheaper).
Anyway, I've mentioned this a couple other times before, but I hadn't really built up that page. I recently ordered a couple new books (which I'll discuss at a later date) which prompted me to finally get some info on that page.
So far, I have only managed just a list of the books I currently own. Eventually, I wouldn't mind having (at least) a quick blurb or (preferably) a full review of each book here, but for now this will have to suffice.
If you have books you would like to suggest, please leave me a comment or use the contact form to email me.
And on that note, I'm going to go read one of my new books.
- Bill
SeaLife DC1200 (part 3)
ktuli — Sun, 10/17/2010 - 07:25
I'll try wrapping up the discussion of the DC1200. We'll take a look at some of the features that make this camera nicer than its predecessors.


To the left, you can see the buttons that the DC1000 had, while to the right, you can see the newly redesigned (they call them piano style) buttons on the DC1200.
The biggest improvement is that the new design uses a rocker switch for the zoom function. In the far right image, you'll see the red and black striped zoom toggle switch; as opposed to the top two buttons on the left which controlled the zoom in the old design. Having used that old style housing, I can attest to how horrible those tiny zoom buttons where, making me so much less likely to use the zoom feature. Half the time, I had to look down at the camera to find the buttons, and once I would, my subject would move, or currents would drift me out of position.
Hopefully with a few nicer features, and learning how to better use the flash, I'll be able to come home with some nicer photos than previous trips.
Now I want to go diving... more than I already did.
- Bill
SeaLife DC1200 (part 2)
ktuli — Sat, 10/16/2010 - 16:27
Today, we'll talk accessories.
Because we bought the Elite bundle with our DC1200, we got two key accessories - a Digital Pro Flash and a 24mm Wide Angle Lens.
First, let's look at the flash strobe. I used this model of strobe last year on our trip and honestly had nothing but bad luck with it.
I believe the issue I was having was that a "pre-flash" setting got turned on somehow. After reading my manual that came with the new one, I found that the pre-flash setting works for other brands of cameras that use a burst of the flash to assist with the auto-focus system. The pre-flash setting tells the flash to ignore the first X flashes before firing. Since the SeaLife flash does not use an electrical signal to fire, but rather uses a sync-cord which is a fiber-optic cable that passes the built in flash along to signal the external flash ti fire, this pre-flash setting is necessary.
The other item I needed to learn about this flash is that it still only has an effective distance of 2 to 8 feet underwater. This is not a problem of the flash not being powerful enough, but a side-effect of light not traveling through water as easily as through air. To be specific, light travels 25% slower through water than air, thus making the light fall-off from the flash that much more drastic.
This is definitely something I'll have to work on while in Wakatobi if I plan on bringing back good photos.
The second accessory, I have not worked with before. It is a wide angle lens adapter that attaches to the front of the housing and works with a couple optical elements to allow for a wider view than the built in lens.
The lens is very heavy and from looking at it and reading reviews, it sounds like the optical glass is of decent quality, so hopefully it won't matter to have those extra elements in the mix. The extra weight will probably end up making the entire setup negatively buoyant, which is somewhat unfortunate since a positive buoyancy would cause the camera to float should it slip from my grasp during a dive (making it more likely to relocate).
Additionally, it comes with a soft neoprene case to keep the optics from getting scratches in the carrying case, and also has a dock that attaches to the bottom of the flash bracket to store the lens during dives when not in use.
SeaLife DC1200 (part 1)
ktuli — Fri, 10/15/2010 - 08:34
So I mentioned this briefly earlier, but back in August, Anya and I purchased an SeaLife DC1200 underwater camera.
The camera is a point and shoot model, which obviously is not my preference, but we simply can't afford the extra $3000 it would cost to purchase the housing, strobe, and dome ports.
We're saving up for a trip to Wakatobi Resort in Southeast Sulawesi in Indonesia. I am sure there will be some incredibly awesome photo opportunities, and I hope I don't regret having to cut corners and take a point and shoot.
We've rented other cameras from SeaLife from our dive group - Divehards International - and gotten mixed results. You can see our best underwater photo which was taken with a DC600. Then last year, we rented a DC800 and came back with several sets of photos (1, 2, 3, 4, 5, 6).
The kit we purchased came with everything you see to the left:
So far, the camera has not been on a dive trip yet. I've used it to make a couple kayaking videos. I have also tried to get a few underwater shots of fish with it while kayaking, but haven't had enough luck to keep anything. But at least the housing is water-tight enough to be submerged.
Over the next couple posts, I'll go into some of the features of this camera, what makes it better than the predecessors we have rented in the past, and maybe talk a little more about the challenges of underwater photography.
Stay tuned! And if you feel like donating a housing and strobe so I can take my Canon 7D diving with me, drop me a line and let's talk... ;)
- Bill
Bees and Flowers (part 3)
ktuli — Wed, 10/13/2010 - 12:50
Alright - just a last photo of bees and flowers.
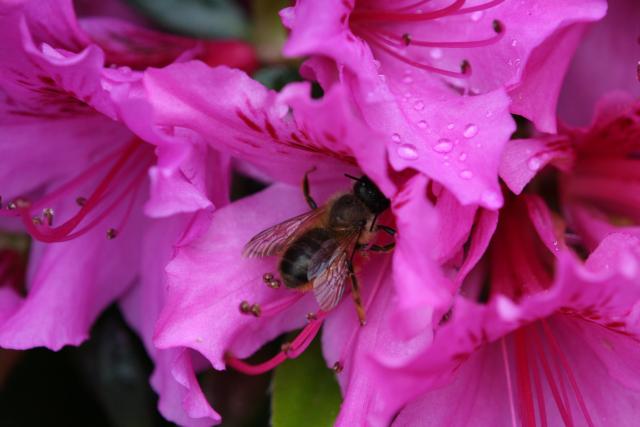
Technical Data: Canon EOS Digital Rebel XT, Tamron 180mm f/3.5 Di SP LD 1:1 Macro, 1/160 sec at f/5.6. ISO 400. No post production. Taken in our own backyard.
What Works: Focus is tack sharp - the detail in the bee is spot on, and the water droplets on the upper flower are nice and crisp. Despite being an outdoor shot, the exposure is nicely done with no over or under exposed areas.
What Doesn't Work: The composition isn't exactly super strong, especially with the bee's head being partially hidden within the flower - perhaps a lower angle would have worked better. Also, perhaps isolating a single flower with the bee would have worked a little better.
- Bill

