macro
Macro Quince
ktuli — Tue, 04/26/2011 - 21:13
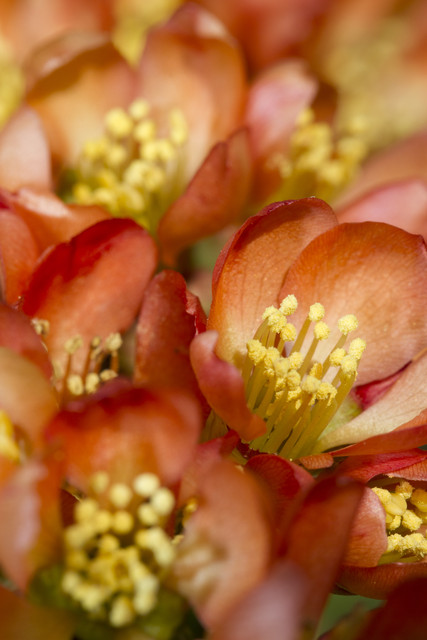
I suppose we'll continue the macro flower shots
I shared another shot of quince blossoms from last spring. This year, I used my new flash and 100mm f/2.8L macro lens to get in a lot closer to blossoms.
Technical Data: Canon EOS 7D, Canon EF 100mm f/2.8L Macro IS USM, 1/100 sec at f/11. Canon Speedlight 580EX II flash in auto mode. Image Stabilization on. ISO 200. RAW processing in Adobe Camera Raw.
Why This Photo: More macro and new flash work.
What Works: The tack sharp focus on the pollen covered stamens is a nice balance with the blurred foreground and background produced by the fairly shallow depth of field. Also, having the in-focus blossom off-centered in the shot is appealing. The entire shot being filled with blossoms prevents there being distracting elements in the frame.
What Doesn't Work: The in-focus blossom breaks the edge of the frame, and ideally should have been kept within the frame. Additionally, the bottom edge of the frame is somewhat darker than the rest - perhaps due to a slightly mis-aimed flash.
I really like bright orange color that pervades this entire shot. On top of that, the very close look at a small flower that could easily be overlooked provides a nice illustration of a tiny pattern in nature.
What do you think?
- Bill
Macro Tulip
ktuli — Mon, 04/25/2011 - 20:50
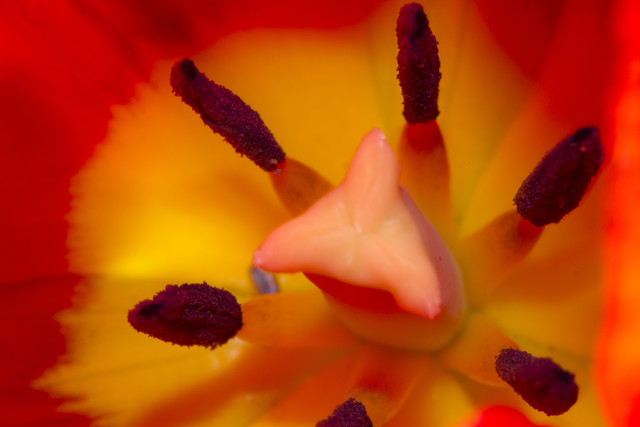
So with another break in the rain today, I decided to take the camera and my new flash (more on that soon) and flash bracket out and see what else I could get. I find tulips hard to shoot singly as their size proportions just make them difficult to capture. So I decided to aim the flash flight inside the flower and work on a macro view.
Technical Data: Canon EOS 7D, Canon EF 100mm f/2.8L Macro IS USM, 1/13 sec at f/16. Canon Speedlight 580EX II flash in auto mode and wireless control. Image Stabilization on. ISO 200. RAW processing in Adobe Camera Raw.
Why This Photo: Honestly, I was just playing with the new flash in wireless mode and seeing how well the flash bracket worked. Well, that and what I said above about tulips being hard to shoot.
What Works: The bright colors seem to pop, and the placement of the stigma and stamen off-center is nice. The focus resting right on those pollen covered stamen provides a good counter balance with their rough surface compared to the smooth petals of the tulip.
What Doesn't Work: Because of the flash, the reflection of the red color from the flower is picked up on the stigma (the center piece of the flower). Additionally, the right edge of the frame has part of the petal curling back into the shot - with the depth of field it is fairly blurred, but still is a little distracting.
Drop me a line and let me know what you think.
- Bill
Feeding Orange Butterfly
ktuli — Wed, 04/20/2011 - 20:33
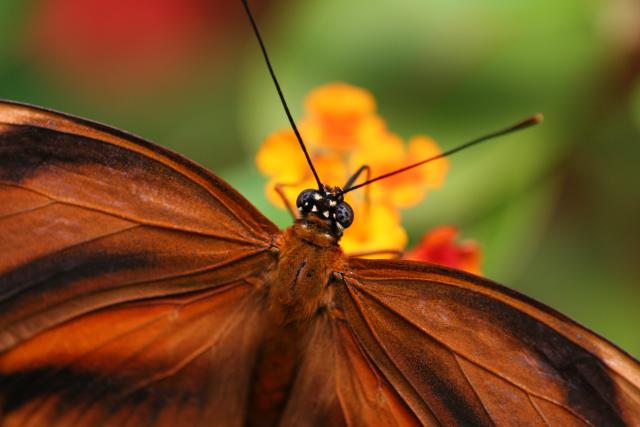
I have to admit that this photo is a bit old and actually dates back to when I had no clue what I was doing and was shooting in one of the auto-modes. However, I feel we need something with a little color since the last few have been somewhat drab. With spring finally setting up shop, shots like this will hopefully be more frequently.
Technical Data: Canon EOS Digital Rebel XT, Tamron 180mm f/3.5 Di SP LD 1:1 Macro, 1/320 sec at f/4.5. ISO 400. No post production. Franklin Park Conservatory, Columbus, OH.
Why This Photo: What can I say? I like macro photography, and butterflies make interesting macro subjects.
What Works: A shallow depth of field produces a nicely blurred background, while keeping the camera parallel to the wings of the butterfly keeps them in relatively good clarity. Also, the focus is sharp on the eyes of the butterfly, and a diagonal composition nicely balances the orange butterfly with the green plants.
What Doesn't Work: The antenna breaks the top of the frame, and the depth of field is a bit too shallow to keep the tips of the antenna in clarity.
I also have to apologize that I don't know the species of this butterfly, and I'm feeling a little lazy tonight, so I don't have my normal species information.
I'm just looking forward to getting out and capturing more spring macros soon!
- Bill
Poll: Claytonia caroliniana
ktuli — Mon, 04/11/2011 - 19:40
Well, I've been on the fence about shooting RAW for a little while now. I've heard some a great deal number of sources that I really should. My reluctance stems from not really liking to have to do too much post production work. I really like to get my shots right in camera and not mess with things after the fact.
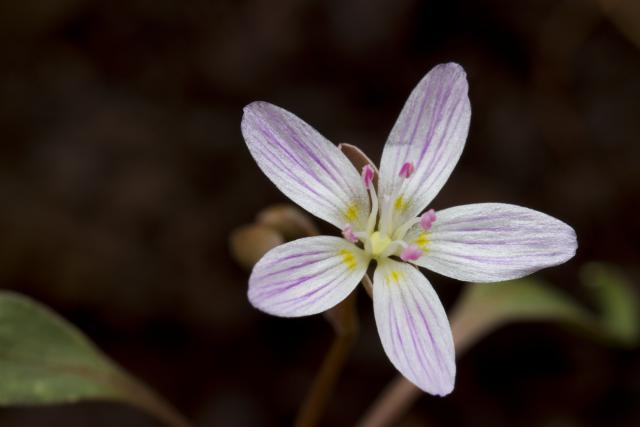
But this past weekend, I captured some shots in both RAW and JPG formats so I could start comparing them to see what I preferred. Take a look and let me know what you think...
 JPG Straight out of the Camera |
 |
 JPG w/ Auto-Smartfix from PSE8 |
|
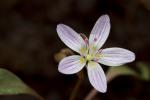 RAW w/ Brightness +50, Contrast +40, Sharpening 25 |
Technical Data: Canon EOS 7D, Canon EF 100mm f/2.8L Macro IS USM, 1/13th sec at f/11. Image Stabilization on. ISO 200. Post production as noted. Powdermill Nature Reserve, Rector, PA.
In case you're wondering, the flower is a Claytonia carolinana. They are tiny little flowers - probably in the range of 1/2 to 3/4 inch in size - and are some of the early bloomers each spring. I had been to Powdermill a couple weeks earlier, but it was cold the night before and there were no flowers to be found. I made a return trip this weekend and found many of them scattered all over (if you looked closely enough!). I searched around for a good specimen to shoot (most times, the flower faced downwards), and actually ended up accidentally uprooting it while trying to clear some debris around it - I relocated it, replanted it, and took the shots I wanted.
Oddly enough, I specifically remember "under-exposing" this image in the field. The camera kept wanting to meter the scene brighter to get the details in that dirt background, and I specifically wanted to avoid that so that I could maintain as much detail in those white petals as possible. Yet, when I looked at the JPG, it still looked bright and washed-out. Then when I ran it through the Auto Smart-Fix function in Photoshop Elements 8, it made that background even brighter still!
I will be honest, I have no clue what settings I should have chose for the Brightness and Contrast when converting the RAW file to JPG, but I simply slid things along until it looked like I remembered it looking in the field. Probably a little more aggressive than it really was, but that's ok. I had wanted the background dark, and I think the RAW file achieves that. I still have some learning to do to figure out what to do with the RAW conversion.
But for now, place your vote for which version you think looks the nicest.
Thanks for stopping by!
- Bill
Wakatobi: Fire Dartfish
ktuli — Wed, 03/23/2011 - 20:59
Alright, back to the dive photography (how I wish that meant back to taking dive photos!) to try and get back into my routine of regular posts.
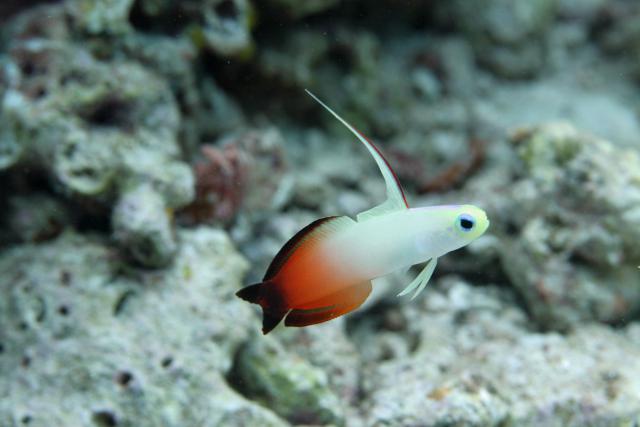
Today's little guy (or girl - can tell for certain what sex it is) is a Fire Dartfish (Nemateleotris magnifica). They are small (about three inches max) and very skittish, so getting close to fill this much of the frame with one is a bit of a challenge.
Technical Data: Canon EOS 7D, Canon EF 100mm f/2.8L Macro IS USM, 1/130th sec at f/8. Image Stabilization on. ISO 800 (Auto). Ikelite Housing and Port with Ikelite 161 Strobe in TTL Mode. Auto-smartfix and brightness reduced 10% in Photoshop Elements 8.0
What Works: The best part of this photo for me is how the fish jumps off the screen - there is just a three dimensionality to the shot that really pops! The colors of the dartfish are spot on, and the depth of field provides a nice soft background with just enough detail to show some of the liverock in the background.
What Doesn't Work: First, the dartfish itself is a bit washed out - those bright white scales are just so easily over-exposed. Additionally, the positioning of the fish in the frame is less than ideal with it looking out of the frame.
What do you think? Drop me a comment and let me know.
- Bill
Bali: Red Dragonfly
ktuli — Tue, 03/15/2011 - 19:44
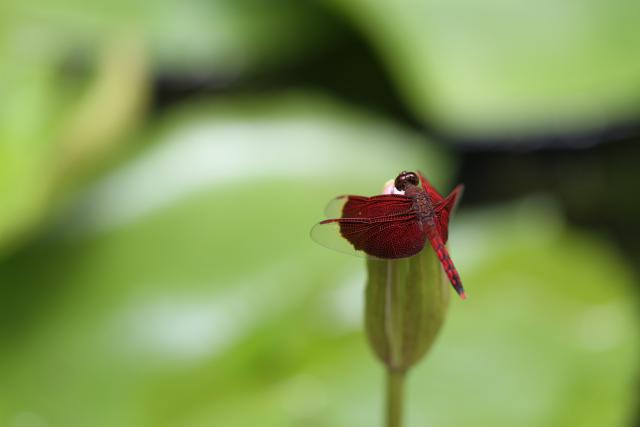
Technical Data: Canon EOS 7D, Canon EF 100mm f/2.8L Macro IS USM, 1/790th sec at f/2.8. Image Stabilization on. ISO 200 (Auto). No post production.
Why This Photo: These beautiful red dragonflies were flying around the Puri Santrian hotel among the many water gardens on the grounds. As soon as I saw them, I knew I had to try out the new macro lens with them.
What Works: The off-centered dragonfly is in perfect focus (looking at the fullsize version reveals the intricate detail in the delicate wing. The extremely wide aperture of f/2.8 produces an incredibly soft bokeh background that has just enough shape to show the lily-pads that accompany this closed water lily bud.
What Doesn't Work: That same wide aperture that produced the soft background also produced such a narrow depth of field that the entire dragonfly is not in clarity. I feel this is ok to some extent, but wish that the dragonfly's body and head were in more clarity.
- Bill
Spring Buds
ktuli — Tue, 03/08/2011 - 20:28
Yeah - I am still struggling with that lack of motivation, so I'm going to take a little break from the Wakatobi photos for a little bit. I have been looking around at various photography challenge websites as a way to get some inspiration. I found one that was running with the theme of Spring (though I can't seem to find it again), so I grabbed the camera after I got home yesterday and headed out.
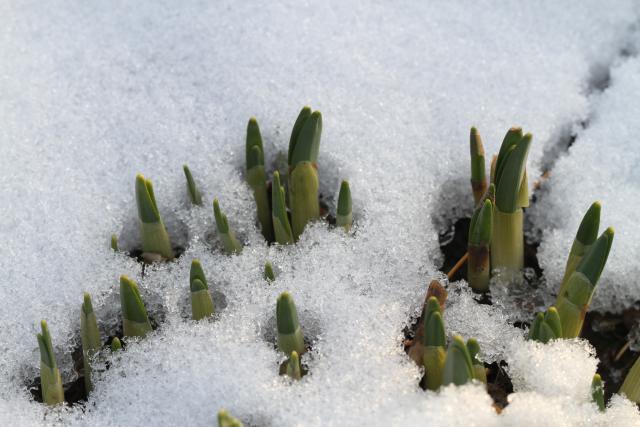
I went out with a specific shot in mind, and managed to actually come back with it...
 |
|
 Camera Metered 1/130 sec at f/8 |
 Manually "Over-Exposed" 1/40 sec at f/8 |
Technical Data: Canon EOS 7D, Canon EF 100mm f/2.8L Macro IS USM, 1/130th and 1/40th sec at f/8. Image Stabilization on. ISO 200 (Auto). No post production.
What is being illustrated here is the tendency for cameras to be "confused" by large amounts of bright or dark areas. This frequently happens in snowy scenes or bright sandy beaches being underexposed if you trust the camera's built in meter (ie: if you use auto mode, or even aperture or shutter priority, or even if you use the suggested exposure while in manual mode). In the case of snow, you end up with grey snow.
To fix this, you need to manually "over" expose the image. So yesterday, when I shot these buds bursting up through the snow, the camera's meter exposed the image a little dark and you can clearly see how the white snow appears grey. If you're using manual mode simply nudged the exposure time up a bit, or use your camera's exposure compensation feature, and the result is bright white snow.
I know... if you're like me, you're sick of seeing snow, but I didn't have any bright white tropical beach sand to illustrate this on, so hopefully this little sign of impending spring is enough.
Hopefully it also works to help get me motivated again. and I can get back to more regular posts.
- Bill
PS: Oh - I almost forgot, a similar phenomenon happens in a very dark scene with lots of black. The camera's meter will result in an exposure where the black begins to turn grey. The solution there is simply to "underexpose" a little, and you're all set.
Wakatobi: Cuttlefish!
ktuli — Sun, 02/27/2011 - 20:17
So one of the things that I really wanted to see while in Wakatobi was a cephalopod. So far on our two previous dive trips to Cozumel, we'd gotten close but my poor air consumption caused us to miss out. The first year, we were sitting on the boat for a good while before the rest of the group surfaced with stories of seeing multiple octopi. Last summer, the group all swarmed a small coral mound where an octopus was spotted, but my air was low and strong currents literally pulled Anya and I away from the opportunity.
For this trip, I was bound and determined to see some sort of cephalopod - an octopus, a squid, or possibly even a cuttlefish (I wasn't going to push my luck and expect to see a nautilus). The brochure for Wakatobi made it seem like we would see any (or all - except for the nautilus) of these critters on a majority of the dives.
The week started out semi-promising. The folks at the front of our group happened upon an octopus while it was feeding on a crab. Unfortunately for us, we were at the back of the group and he got scared off before we could get there. I saw a fleeting glimpse of something, but couldn't be certain of what I saw.
Then things went cold. Everyone in the group (including Mike - our instructor - who has more dives than anyone (including the dive-masters) and as seen just about everything) kept asking the dive-masters over and over for octopi or cuttlefish. The dive-masters subsequently gave us more and more desperate answers as to why we haven't seen them or that they aren't quite as common as we might have expected.
And then came our night dive - which I knew would be my best chance. I decided I wasn't surfacing until I saw something good - something really good. And I didn't care if that meant I had to swim from person to person in the group and steal air from their secondary regulator (interestingly enough called an octopus regulator) until I did.
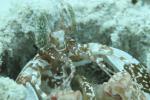
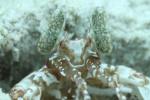
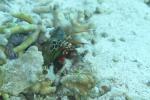
Early in the dive, the group split into two; myself, Anya, Ferris, Bruce, and Vanessa went off in one direction, while the others went somewhere else (I still don't know how we got split up, or where they went). And things started out pretty promising as we saw a frogfish and a squat lobster (more on both of those at a later date). While both of those things are both cool, they're not cephalopods...
Then Vanessa started making quite the racket to get our attention - it is customary while diving to simply tap on your air tank (usually with something else metal) to make noise to get other divers' attentions. We quickly made our way over to where she was, and were rewarded with seeing this little guy...
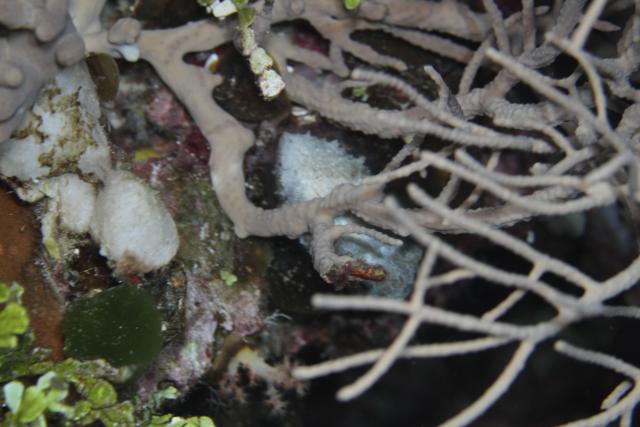
Technical Data: Canon EOS 7D, Canon EF 100mm f/2.8L Macro IS USM, 1/12th sec at f/8. Image Stabilization on. ISO 400 (Auto). Ikelite Housing and Port with Ikelite DS161 Strobe in TTL Mode. No post production.
Honestly, it took me a few seconds to realize what I was looking at - both out of sheer excitement and a bit of confusion from the strong camouflage. In the middle of both of those photos, there is a small white-ish cuttlefish. I apologize for the terrible photos - they're the best I got. It was dark, my pulse was racing, and I wanted to get some shots fired before it disappeared - which it did... only 7 seconds after we found it!
In the first shot, you can see the cuttlefish more exposed through the coral, but camera movement caused a terrible amount of ghosting. You can make out the main body and the large round eyes on the head, and the short tentacles curled up in front of the face. On the second shot, things are a bit more crisp (though still somewhat blurred) and shows a bit more of the skin texture (cuttlefish are able to change their skin texture at will for camouflage), but is more hidden behind the coral.
I'm not 100% sure, but the species might be a Crinoid Cuttlefish (Sepia sp. 2) or a baby Broadclub Cuttlefish (Sepia latimanus). The Crinoid species only get to about 2 inches full grown, whereas the Broadclub - the more common for this area - can grow to 20 inches. Either way - crinoid or baby - this little guy was quite the find! Certainly something fairly rare to see. And obviously, fairly hard to photograph.
Regardless, a mere seven seconds that I will remember for the rest of my life. I might not have captured the best photos with my camera, but I certainly recorded the image in my brain! Which is something that you need to remember to do as a photographer. Sometimes it is the photo that got away that we remember the best and means the most to us. Especially when it drives us to get out there and try for another...
... which I hope I get to do sooner rather than later.
- Bill
Wakatobi: Nudibranch & Flatworm Super Assortment
ktuli — Wed, 02/23/2011 - 21:07
As I said before, one of my favorite critters from Wakatobi were the nudibranchs and flatworms.
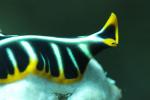
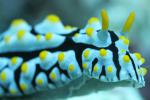
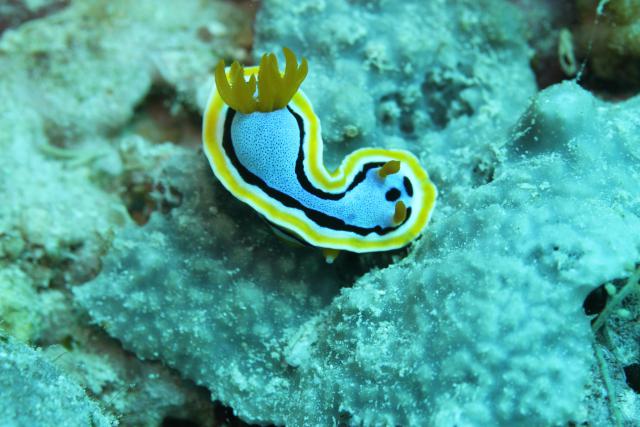
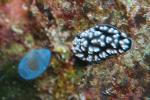
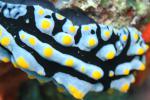
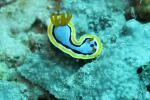
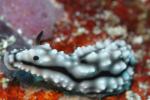
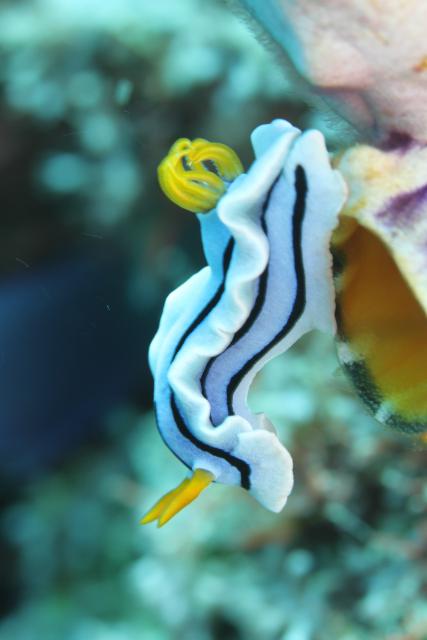
In rough terms, they both fall under what most people would call sea slugs. The main difference between the two are that nudibranchs have antennae called rhinophores and most have external gills, whereas flatworms do not have the rhinophores (though some like the Tiger Flatworm and Linda's Flatworm below adjust their head shape to fake them) nor any external gills.
Regardless, they're cool little things... take a look (mouseover the thumbnail for the larger view)
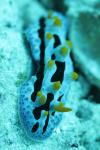 |
Sky Blue Phyllidia (Phyllidia coelestis) |
 |
 |
Willan's Chromodoris (Chromodoris willani) |
|
 |
Elisabeth's Chromodoris (Chromdoris elisabethina) |
|
 |
Racing Stripe Flatworm (Pseudoceros bifurcus) |
In reality, these are pretty tame looking nudibranchs, so I'm looking forward to another trip back to find more! I think if my count is correct, I photographed thirty-five different individuals (in nineteen dives!) consisting of four different species of flatworms and fifteen different species of nudibranchs.
So cool!
- Bill
Wakatobi: Mantis Shrimp
ktuli — Wed, 02/16/2011 - 20:18
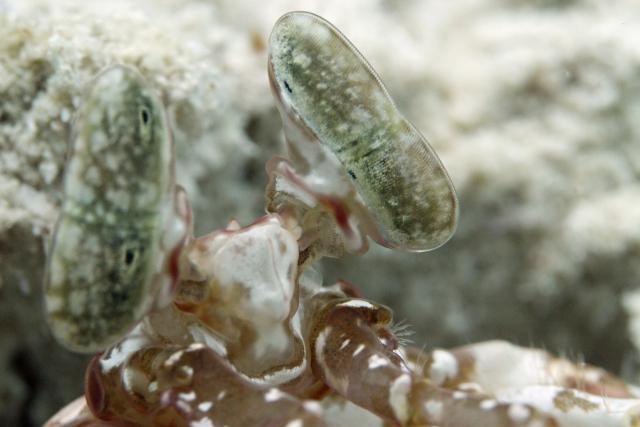
What you see here are a pair of the most complex eyes known to man.
Technical Data: Canon EOS 7D, Canon EF 100mm f/2.8L Macro IS USM, 1/170th sec at f/8. Image Stabilization on. ISO 2500 (Auto). Ikelite Housing and Port with No Flash. Removed Color Cast and Auto-Smartfix in Photoshop Elements 8.0.
They belong to a Tiger Mantis Shrimp (Lysiosquillina maculata).
Mantis Shrimp (not related to either Praying Mantis nor Shrimp) were something I had on my checklist of things I wanted to see on this dive trip. And much like the nudibranchs, I was not expecting how often we would see them. I personally saw three individuals, plus evidence of at least two more, and others in the group saw several more individuals. This individual was seen at my personal favorite dive site at Wakatobi - Roma, which was also were my False Clownfish photo came from, and we also saw a Blue Ribbon Eel, a Leaf Scorpion Fish, Nudibranchs, Spine-cheek Anemonefish, Fire Dartfish, and tons more (but you'll have to stop back for those photos). If someone told me I could go back to Wakatobi and dive only one site the whole week, it would probably be Roma that I'd pick.
Anyway, you might be asking why those eyes are the most complex known to man. If you're not, you read that article I linked up there, and actually understood it all (I certainly didn't!). But the short story is this: they can see a much wider spectrum of light from us (spanning from infra-red all the way into the ultra-violet spectrum!), meaning they can see about ten times the number of colors we can, they can see and filter linear polarized light (we need sunglasses or camera lens filters for that), and some species can even see circular polarized light (also a job for lens filters), and additionally they do not lose depth perception when using only one eye (humans need both eyes for depth perception). Oh yeah, and they rotate independently, stick out from the head (ie: can see around corners), and if my research is correct, can pick up satellite television. Ok, maybe not that last bit, but they're still pretty impressive eyes. Then again, perhaps it isn't as much of an exaggeration after all - an article on Wired.com discusses how the Mantis Shrimp's eyes are being researched to help develop the next new High-Def recording medium (and I haven't even started switching to Blu-ray, and they're obsolete!).
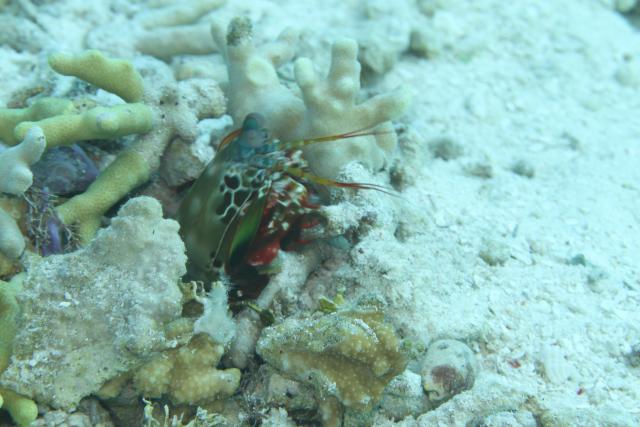
The last guy there is a Peacock Mantis Shrimp (Odontodactylus scyllarus) and is probably considered the more common mantis shrimp. They are sometimes available in the pet trade (and sometimes come into a tank as an unexpected hitchhiker on coral or live rock). They are much more colorful, thus their names.
In fact, I get to take credit for finding that guy on that particular dive (which was at a site called 'The Zoo'). I saw his burrow from about twenty feet away, and quickly made my way there. As I got close, I thought I had seen something duck inside, so I glanced into the hole (literally just a hole in the ground that drops about a foot deep, then branches off to the side) but didn't see anything. So I settled in on the sand and waited and watched. After a few minutes, Brigette (one of our dive instructors) came over and tapped me on the shoulder - which made me jump (I will explain why shortly). She asked what I was looking at, and I tried to explain that I wasn't quite sure if there was anything there or not. But she settled in next to me to wait too. No more than a few seconds later, the Peacock Mantis Shrimp returned to the top of his burrow and did some housekeeping, throwing a piece of broken coral out. I fired off a few frames. I was thrilled, but running low on air, so I passed the camera off to Anya and tried to indicate to her what I had been watching and to get some photos. I must have done a terrible job of explaining what it was, because she said she went over and was looking right down the burrow and trying to figure out what she was supposed to take photos of. Perhaps it was good that she didn't see the Mantis Shrimp, because he probably wouldn't have been thrilled with her getting so close to his burrow.

So why did I jump when Brigette tapped me on the shoulder? Well, as I lay there on the sand staring at this empty hole in the ground, the thought was occurring to me that perhaps the reason it was empty was because the occupant wasn't home. Peacock Mantis Shrimp are roaming hunters, and when they're out of their burrows, they look like the guy to the right (kind of alien, huh?) (Sorry, I did not take that photo - all of the mantis shrimp I saw were in their burrows.)
Still wondering why I might jump? Ok, let me add that some mantis shrimp can grow to 18 inches long! Still not convinced? Let's throw in their hunting styles. There are two styles of mantis shrimp, smashers and spearers. Smashers obviously, as the name implies, simply smash their prey to death; whereas spearers resemble praying mantids more in that they have back-folding raptorial arms they use to impale and hold prey. Still holding out on me, thinking I am a bit too jumpy? How about if I tell you that their attacks have the speed of a .22 caliber bullet - plus are supposed to be able to cause cavitation (causing a voided space in the water, which is then filled, causing a shockwave impact). Having owned a pet store for several years, mantis shrimp were referred to as 'thumb smashers' (I never carried them in my store, but often saw them at distributors). In general, they're nasty little guys. They have the strength to break crab shells, fingers, aquarium glass, and even camera housing lens ports!
Even with all of that, they're still fascinating creatures, and I was thrilled to get to see two different species of them in the wild in their environment, and to bring back photos of both. I look forward to getting even better shots next time!
- Bill

