photoshop
Turks and Caicos Explorer: Caribbean Reef Sharks (part 1)
ktuli — Mon, 10/29/2012 - 20:10
Ok - as I hinted at yesterday, I really struggled early in the week.
One of my mistakes was a classic bit of photographer hubris in that I thought I knew enough that adding a new piece of gear to my setup wouldn't be an issue and I'd just pick it up like a fish to water (sorry - terrible pun, I know!). Well, adding a second strobe to my setup certainly was not something I could do without first needing to learn some things - I should have tried out some dry photography with it in the housing and both strobes mounted before going on the trip.
The second issue I had was that there was quite a bit of rust build up. It had been a year since I'd done underwater photography (far too long!), and it took me a while to reacquaint myself with the setup and to remember what settings worked and which didn't. Again, some dry photography might have helped a little, but also just looking at old photos and seeing what worked and what settings were used would have gone a long way.
And the last issue was that despite knowing better, I was using the camera in a way that it just wasn't meant to operated. In particular, with the 100mm macro lens mounted, I certainly could focus on larger subjects that were a ways off, but I really shouldn't have been doing so. I know to reduce the water between me and my subject, and I know the ugly results I get when I fail to do so.
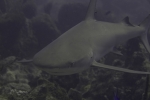
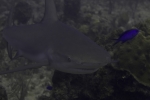
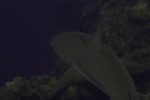
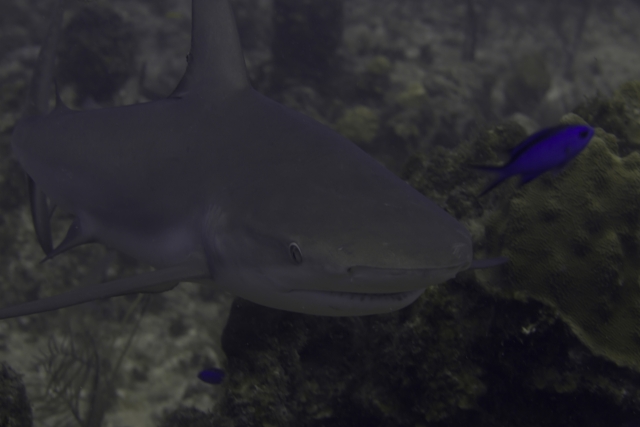
Despite that, and with a liberal amount of Photoshop work, here is my first set of Caribbean Reef Shark (Carcharhinus perezii) from the trip. Hopefully I have better ones to share later...
 |
 |
 |
 |
 |
|||
Technical Data: Canon EOS 7D, Canon EF 100mm f/2.8L Macro IS USM, 1/200th sec at f/8. Image Stabilization on. ISO 320. Ikelite Housing and Port with dual Ikelite 161 Strobes in TTL Mode. Raw conversion in Photoshop CS5, Color cast removed in Photoshop Elements 9.
I kept these not only because I was able to partially salvage them, but also because I felt these were the first dives we were on where we saw "real" sharks. I know the nurse sharks we've seen before are quite real (and potentially dangerous in the wrong situation - ie: diver stupidity), but these are the first sharks with that classic shark body shape, and they weren't tiny little things... the ones we saw all week ranged in size from 6-10 feet long, and were bulky in weight to match... and fast. Just watching them swim was a treat - being in the water with such a beautiful creature and not being afraid (ok - mostly not afraid) of it was completely incredible.
- Bill
PVGP 2011 (part 7)
ktuli — Wed, 08/24/2011 - 19:04
Ok - sorry for the lack of posts recently. I've been alternatively too busy or too tired or just a bit unmotivated, but I am forcing myself to try and get back to more regular posts.
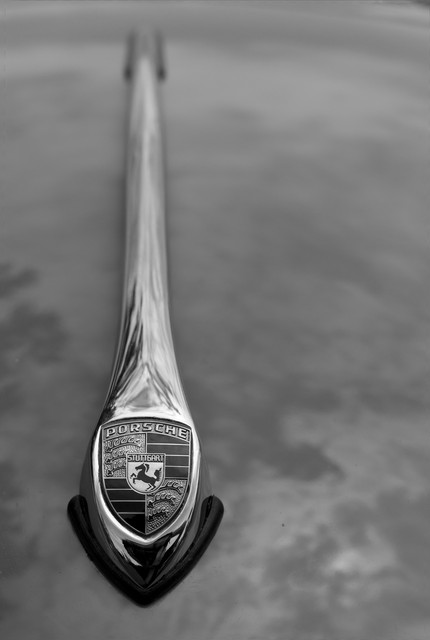
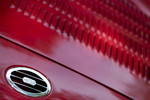
This year's marque was Porsche, so there were plenty to shoot. I liked this hood ornament and thought the shallow depth of field would be nice as the ornament swept back along the hood of the car.
I took a couple shots of this hood, and eventually liked this offset version the best - I tried a perfectly centered version, and it just didn't work for me.
If you mouse over the shot, you will get to see the original, and you can get a feel for the post production edits that I did to make this shot a bit nicer. First, I rotated slightly clockwise to get the hood ornament perfectly vertical - it had a very subtle tilt before, but it was enough that I could see it. Next, I used some content aware fills to fill in any gaps left by the rotation (I could have also cropped to take care of them) and to remove the bright reflection from the hood as it was very distracting.
Finally (and obviously), I converted to black and white. For the most part, this is another shot (like the MG Wheel) that really doesn't change that drastically going to black and white, but the effect really helps to clean things up and make the shot really stand out nicely. In particular, the black and white treatment helped to make the Porsche emblem much more readable than it was in the color version. By removing the color and highlighting the contrast, it made that feature much more prominent in the frame.
Technical Data: Canon EOS 7D, Canon EF 50mm f/1.8 II, 1/1000 at f/5. ISO 100. 2011 Pittsburgh Vintage Grand Prix, Pittsburgh, PA. Raw conversion, modifications, and B&W conversion in Photoshop CS5 (mouseover for original).
Thanks for stopping by.
- Bill
PVGP 2011: (part 6)
ktuli — Mon, 08/08/2011 - 18:04
Ok - I am by no means a car person. I probably know less than I really should about cars, but I suppose I know enough to get by. However, while shooting at the Vintage Grand Prix recently, I didn't think it was necessary to know what parts were what. I was mainly looking for lines and forms and colors and contrast.
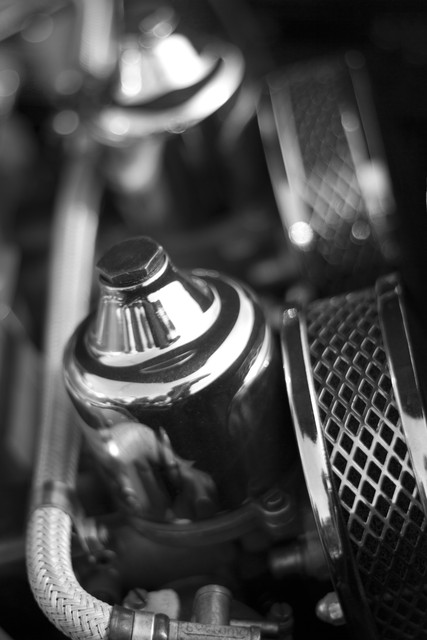
This was one of those cases. I think they're air filters of some sort, but I really don't know for sure....
However, the repetition of the shapes - from the two air filters, to the parts next to them, to the cross pattern on the air filters - and the dramatic contrast - as the tops of the parts shone brightly in the summer sun to the dark shadows in the center of the engine - and the strong leading line of the hose all drew my eye into this micro scene.
I didn't do much shooting of the cars themselves, but found that by getting in close and finding these little details allowed me to eliminate distractions and clutter. Ever tried to take a photo of a classic car at a car show while twenty other people wandered around it? If they don't walk right into your shot, you'll never manage to control all of those reflections. So rather than fighting with that, it was just easier to draw on my macro shooting experience and get in close.
Technical Data: Canon EOS 7D, Canon EF 50mm f/1.8 II, 1/640 at f/1.8. ISO 100. 2011 Pittsburgh Vintage Grand Prix, Pittsburgh, PA. Raw conversion and sepia tone conversion in Photoshop CS5 (mouseover for original).
What Works: As I said, the repetition and strong leading line work well. Additionally, the dramatic contrast made for a very nice black and white conversion.
What Doesn't Work: Right off the bat, the hose breaking the bottom of the frame is a bit of a disappointment - the same probably holds true for the front air filter.
All in all, I think it is a very nice abstract.
Thanks for viewing.
- Bill
Poll: High Key Blue Globe Thistle
ktuli — Thu, 08/04/2011 - 16:57
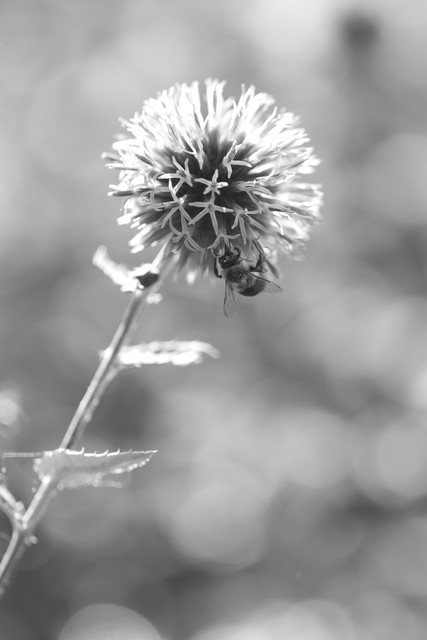
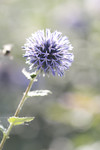
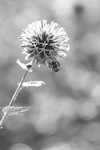
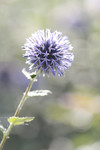
Ok - here's a new one for me. High Key Photography is a style of photography that is generally bright and eliminates any shadows. When I saw this Blue Globe Thistle (Echinops_sphaerocephalus) with this nice back lightning, I decided to crank up the bokeh with a wide aperture and see what I could get.
Due to the proximity of the other thistles, it was really tough to frame it, so I took a couple shots. The first version ended up with an incoming bee in the background that was distracting. The second version was better with the bee having landed on the flowers, but I wasn't as thrilled with the framing. So I took one more shot which ended up with just an edge of the next flower in the frame. I used Photoshop's content aware fill to eliminate the out of focus bee and the other flower as well as to convert each to black and white....
 Version 1 SOOC |
|
 Version 2 B&W |
 Version 1 Fixed |
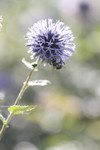 Version 3 SOOC |
|
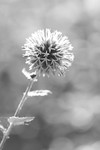 Version 1 Fixed B&W |
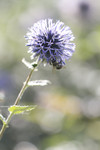 Version 3 Fixed |
|
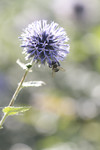 Version 2 SOOC |
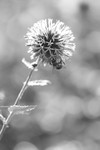 Version 3 Fixed B&W |
Technical Data: Canon EOS 7D, Canon EF 100mm f/2.8L Macro IS USM, 1/250 sec at f/2.8 Image Stabilization on. ISO 100.
So I know this is tough with this many choices, but take a look through the different versions and vote to pick which one you like best. Then leave a comment to let me know what made you choose the one you did.
- Bill
PVGP 2011 (part 5)
ktuli — Sun, 07/31/2011 - 20:58
Alright, I'm winding down with the Grand Prix photos - I still have some more to share, but I think I'll start mixing some bugs and spiders back in (sorry - I have a ton of them and I have to get to them sooner or later). So we'll just do an assortment of shots today.
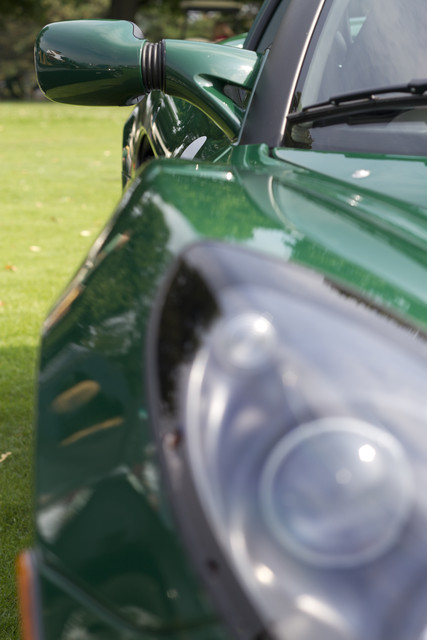
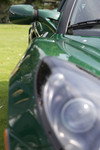
There's a nice assortment of some of the cars you can see at the PVGP. From left to right, you've got a Triumph, an MG (pretty obvious on those two), a Lotus (this is a modern version), a Porsche (again - modern), and a Jaguar. I'm not necessarily partial to any kind of cars when I go to the show, so I freely wander about and shoot whatever (except I'm not a big BMW fan).
I hope you've enjoyed the photos from this year's Vintage Grand Prix. I already have some ideas for what I want to get next year, so we'll have to see if I can remember!
Remember - tomorrow, we get back to the bugs and spiders.
- Bill
PVGP 2011 (part 2)
ktuli — Wed, 07/27/2011 - 21:02
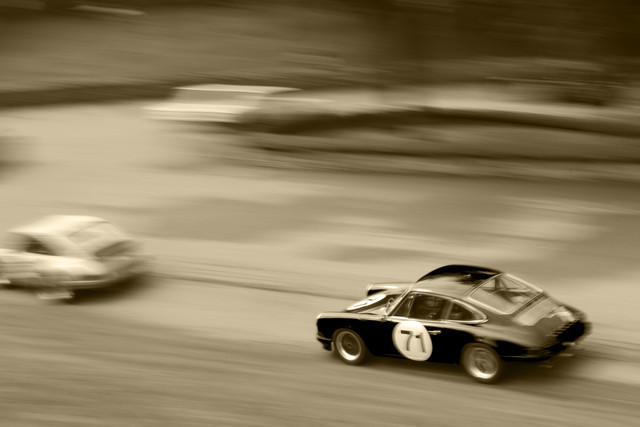
So one of the things I went into this year's Vintage Grand Prix hoping to accomplish is some panning shots. Basically, you keep one of the cars in the same spot within the view finder as you track along with the car as it moves. Doing this produces a blurred background with a sharp in focus car. The blurred background generally will have a streaked appearance, giving the sense of speed and motion. It is much easier said (and typed) than done!
I took probably at least 200 photos, and only got a couple that were worth keeping - and even those are a bit blurry and probably should be deleted... but for a first attempt, I figured they were good enough. And in one case, I used a sepia tone treatment to give it an even more vintage look (and to hide some flaws).
Technical Details: Canon EOS 7D, Canon EF 50mm f/1.8 II, 1/10 at f/22. ISO 100. 2011 Pittsburgh Vintage Grand Prix, Pittsburgh, PA. Raw conversion and sepia tone conversion in Photoshop CS5 (mouseover for original).
Obviously, unless all of the cars are moving at the exact same speed, only one will be in focus. In this case, I was focusing on the red 71 car. If you look closely at the 71 on the door, you'll see it is a bit blurred, and other parts of the car are not as crisp as I would have liked. This either means I panned too quickly, too slowly, and/or moved the camera up/down.
I think I chose a poor location to try this... as the cars would enter the turn, they would change speeds - making it much more difficult to pan at the right speed. It also produced a rather cluttered and confusing background.
But all in all, I still like the shot - despite its flaws, it was a good learning experience, it has a fun feel too it, and I enjoyed capturing it.
- Bill
Poll: Claytonia caroliniana
ktuli — Mon, 04/11/2011 - 19:40
Well, I've been on the fence about shooting RAW for a little while now. I've heard some a great deal number of sources that I really should. My reluctance stems from not really liking to have to do too much post production work. I really like to get my shots right in camera and not mess with things after the fact.
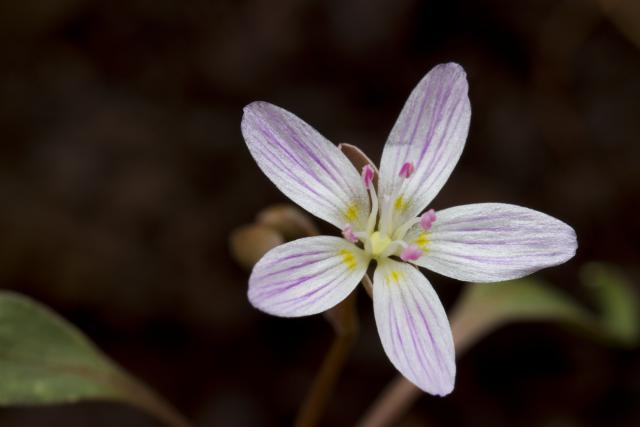
But this past weekend, I captured some shots in both RAW and JPG formats so I could start comparing them to see what I preferred. Take a look and let me know what you think...
 JPG Straight out of the Camera |
 |
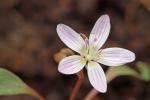 JPG w/ Auto-Smartfix from PSE8 |
|
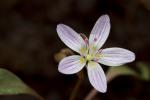 RAW w/ Brightness +50, Contrast +40, Sharpening 25 |
Technical Data: Canon EOS 7D, Canon EF 100mm f/2.8L Macro IS USM, 1/13th sec at f/11. Image Stabilization on. ISO 200. Post production as noted. Powdermill Nature Reserve, Rector, PA.
In case you're wondering, the flower is a Claytonia carolinana. They are tiny little flowers - probably in the range of 1/2 to 3/4 inch in size - and are some of the early bloomers each spring. I had been to Powdermill a couple weeks earlier, but it was cold the night before and there were no flowers to be found. I made a return trip this weekend and found many of them scattered all over (if you looked closely enough!). I searched around for a good specimen to shoot (most times, the flower faced downwards), and actually ended up accidentally uprooting it while trying to clear some debris around it - I relocated it, replanted it, and took the shots I wanted.
Oddly enough, I specifically remember "under-exposing" this image in the field. The camera kept wanting to meter the scene brighter to get the details in that dirt background, and I specifically wanted to avoid that so that I could maintain as much detail in those white petals as possible. Yet, when I looked at the JPG, it still looked bright and washed-out. Then when I ran it through the Auto Smart-Fix function in Photoshop Elements 8, it made that background even brighter still!
I will be honest, I have no clue what settings I should have chose for the Brightness and Contrast when converting the RAW file to JPG, but I simply slid things along until it looked like I remembered it looking in the field. Probably a little more aggressive than it really was, but that's ok. I had wanted the background dark, and I think the RAW file achieves that. I still have some learning to do to figure out what to do with the RAW conversion.
But for now, place your vote for which version you think looks the nicest.
Thanks for stopping by!
- Bill
Wakatobi: Mantis Shrimp
ktuli — Wed, 02/16/2011 - 20:18
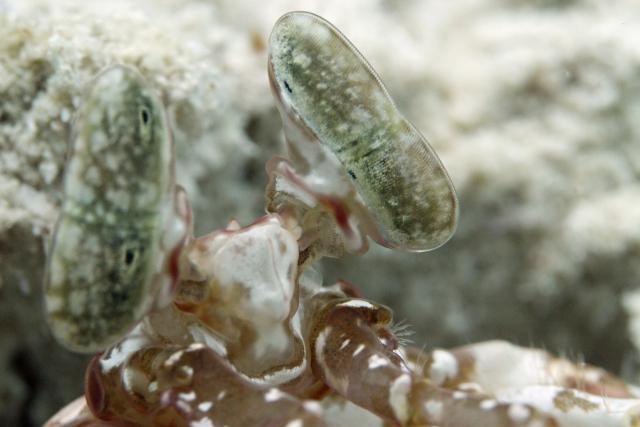
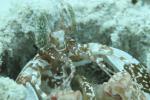
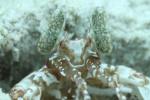
What you see here are a pair of the most complex eyes known to man.
Technical Data: Canon EOS 7D, Canon EF 100mm f/2.8L Macro IS USM, 1/170th sec at f/8. Image Stabilization on. ISO 2500 (Auto). Ikelite Housing and Port with No Flash. Removed Color Cast and Auto-Smartfix in Photoshop Elements 8.0.
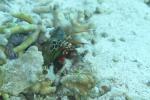
They belong to a Tiger Mantis Shrimp (Lysiosquillina maculata).
Mantis Shrimp (not related to either Praying Mantis nor Shrimp) were something I had on my checklist of things I wanted to see on this dive trip. And much like the nudibranchs, I was not expecting how often we would see them. I personally saw three individuals, plus evidence of at least two more, and others in the group saw several more individuals. This individual was seen at my personal favorite dive site at Wakatobi - Roma, which was also were my False Clownfish photo came from, and we also saw a Blue Ribbon Eel, a Leaf Scorpion Fish, Nudibranchs, Spine-cheek Anemonefish, Fire Dartfish, and tons more (but you'll have to stop back for those photos). If someone told me I could go back to Wakatobi and dive only one site the whole week, it would probably be Roma that I'd pick.
Anyway, you might be asking why those eyes are the most complex known to man. If you're not, you read that article I linked up there, and actually understood it all (I certainly didn't!). But the short story is this: they can see a much wider spectrum of light from us (spanning from infra-red all the way into the ultra-violet spectrum!), meaning they can see about ten times the number of colors we can, they can see and filter linear polarized light (we need sunglasses or camera lens filters for that), and some species can even see circular polarized light (also a job for lens filters), and additionally they do not lose depth perception when using only one eye (humans need both eyes for depth perception). Oh yeah, and they rotate independently, stick out from the head (ie: can see around corners), and if my research is correct, can pick up satellite television. Ok, maybe not that last bit, but they're still pretty impressive eyes. Then again, perhaps it isn't as much of an exaggeration after all - an article on Wired.com discusses how the Mantis Shrimp's eyes are being researched to help develop the next new High-Def recording medium (and I haven't even started switching to Blu-ray, and they're obsolete!).
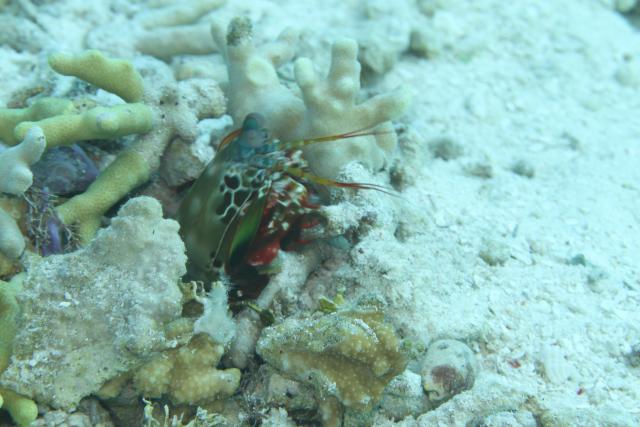
The last guy there is a Peacock Mantis Shrimp (Odontodactylus scyllarus) and is probably considered the more common mantis shrimp. They are sometimes available in the pet trade (and sometimes come into a tank as an unexpected hitchhiker on coral or live rock). They are much more colorful, thus their names.
In fact, I get to take credit for finding that guy on that particular dive (which was at a site called 'The Zoo'). I saw his burrow from about twenty feet away, and quickly made my way there. As I got close, I thought I had seen something duck inside, so I glanced into the hole (literally just a hole in the ground that drops about a foot deep, then branches off to the side) but didn't see anything. So I settled in on the sand and waited and watched. After a few minutes, Brigette (one of our dive instructors) came over and tapped me on the shoulder - which made me jump (I will explain why shortly). She asked what I was looking at, and I tried to explain that I wasn't quite sure if there was anything there or not. But she settled in next to me to wait too. No more than a few seconds later, the Peacock Mantis Shrimp returned to the top of his burrow and did some housekeeping, throwing a piece of broken coral out. I fired off a few frames. I was thrilled, but running low on air, so I passed the camera off to Anya and tried to indicate to her what I had been watching and to get some photos. I must have done a terrible job of explaining what it was, because she said she went over and was looking right down the burrow and trying to figure out what she was supposed to take photos of. Perhaps it was good that she didn't see the Mantis Shrimp, because he probably wouldn't have been thrilled with her getting so close to his burrow.

So why did I jump when Brigette tapped me on the shoulder? Well, as I lay there on the sand staring at this empty hole in the ground, the thought was occurring to me that perhaps the reason it was empty was because the occupant wasn't home. Peacock Mantis Shrimp are roaming hunters, and when they're out of their burrows, they look like the guy to the right (kind of alien, huh?) (Sorry, I did not take that photo - all of the mantis shrimp I saw were in their burrows.)
Still wondering why I might jump? Ok, let me add that some mantis shrimp can grow to 18 inches long! Still not convinced? Let's throw in their hunting styles. There are two styles of mantis shrimp, smashers and spearers. Smashers obviously, as the name implies, simply smash their prey to death; whereas spearers resemble praying mantids more in that they have back-folding raptorial arms they use to impale and hold prey. Still holding out on me, thinking I am a bit too jumpy? How about if I tell you that their attacks have the speed of a .22 caliber bullet - plus are supposed to be able to cause cavitation (causing a voided space in the water, which is then filled, causing a shockwave impact). Having owned a pet store for several years, mantis shrimp were referred to as 'thumb smashers' (I never carried them in my store, but often saw them at distributors). In general, they're nasty little guys. They have the strength to break crab shells, fingers, aquarium glass, and even camera housing lens ports!
Even with all of that, they're still fascinating creatures, and I was thrilled to get to see two different species of them in the wild in their environment, and to bring back photos of both. I look forward to getting even better shots next time!
- Bill
Wakatobi: Photoshopped Lionfish
ktuli — Mon, 02/14/2011 - 19:38
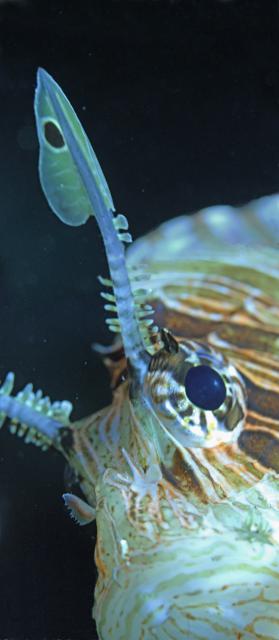
I spent the afternoon fixing up some photos to print so we can frame them and decorate one of our walls with photos from our trip. While I was doing so, I decided to attempt something a little more aggressive.
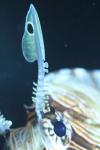
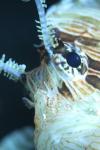
During one of our last few dives, I decided to work in close to one of the Common Lionfish (Pterois volitans). In Cozumel, seeing one of these guys is a very bad thing. They are incredibly invasive and the reef fish in the Caribbean simply aren't ready to compete with them. However, in Indonesia, they are native and thus are in balance.
As I was working with the lionfish, I managed a couple good shots, but afterwards realized that two of the shots had elements that worked individually but I had not managed a single shot with all of the elements combined.
As you can see, the first shot does a great job of capturing that really cool modified "eye-brow" fin but cuts off too much of the face, whereas the second is a good close-up of the fish's face, but is missing the "eye-brow". So I got the idea to combine the two shots to get one single photo with everything. I also decided to stick with the extra long/narrow vertical format it produced.
Unfortunately, the two exposures were slightly different, so there was a lot of adjustments needed to get the colors to match. This required adjusting the colors and brightness and contrast several times - oddly to match the antenna took one batch of changes, while to match the rest of the face took another different batch.
Additionally, the scale of the two shots were also different, which luckily by overlapping some elements, I was able to match things up in that respect. The easiest technique I found for achieving this was to turn down the opacity of one layer and resize and move that layer until things matched up.
In the end, there is still one section that I am not exactly thrilled with how to came out. I'm not going to point out what it is, because I am wondering if I notice it because I sat working on it all afternoon. If you think you know which area still could use some work, drop a comment and let me know.
Technical Data: Canon EOS 7D, Canon EF 100mm f/2.8L Macro IS USM, 1/170th and 1/130th sec respectively at f/8. Image Stabilization on. ISO 1600 and 1000 respectively (Auto). Ikelite Housing and Port with Ikelite DS161 Strobe in TTL Mode.
This is by far the most complex amount of photoshopping I've attempted. Usually I prefer to only make minor subtle modifications, but this little project was fun - I just don't think I'll be doing anything like this too often.
- Bill
Poll: Wakatobi: False Clownfish
ktuli — Tue, 02/08/2011 - 21:22
First off, my apologies for the delay in getting to these posts. After getting home from the trip, I realized I had taken over 6600 exposures (mostly due to the camera being set to high speed burst mode). I spent time removing any photos that we're up to par or just duplicates due to the high speed bursts, and trimmed the set down to around 1750. I meant to go through posting photos from the trip in a chronological order, but I know some folks are waiting for this one, so we'll bounce around a little here to start.
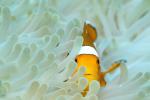
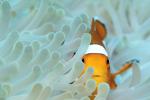
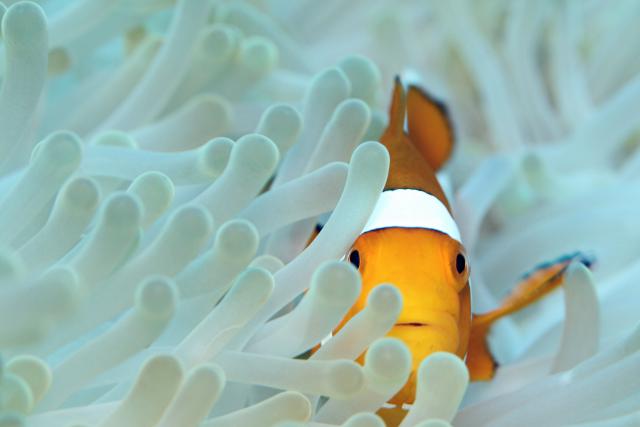
The photo was taken towards the end of the week at the Roma dive site. All week long, I'd been enjoying taking photos of the various anemonefish, and this particular set of False Clownfish (Amphiprion ocellaris) provided a nice opportunity for several great shots.
This one, however, was selected by our dive-masters as the "Photo of the Week" for our week. I was absolutely flabbergasted by that announcement. My underwater photography improved by leaps and bounds each dive during this trip, but I still consider that luck was a very (very) large factor in what I came back with. In the coming posts, we'll discuss some of the ways in which the underwater photography improved.
As I said, I was running the camera in high speed burst mode (providing up to 8 frames per second with my Canon EOS 7D) which helped with my luck in capturing the fleeting moments that occur with the constant movement of the subjects, but I distinctly remember seeing this shot develop in the viewfinder and knowing then that I had captured something nice.
When the shot was presented by our dive-masters at the dinner slideshow, it was slightly modified, so I attempted to duplicate those modifications as best I could here. Mouseover each thumbnail below to see the different versions, then place your vote below to let me know which version you prefer (leave a comment with details as to why you selected what you did if you like).
|
|
|
Technical Data: Canon EOS 7D, Canon EF 100mm f/2.8L Macro IS USM, 1/40th sec at f/8. Image Stabilization on. ISO 400 (Auto). Ikelite Housing and Port with Ikelite 161 Strobe in TTL Mode. Modified version cropped and auto-smartfix in Photoshop Elements 8.0
The modifications are very subtle (as I usually feel any post production modifications should be). Initially, the shot was cropped specifically to make the the fish rest right on the intersection of two of the thirds. Then I ran the shot through Photoshop Elements 8.0's Auto-Smart-Fix to adjust some colors (producing a bit more bluish tint to the anemone and darkening the orange of the False Clownfish).
I know I've mentioned before that I should start selling prints, but I haven't gotten setup to do that yet, even with some requests for this photo specifically. So for now, enjoy it for free if you'd like. Here are the links to the fullsize versions - Original and Modified - for use for printing or as a wallpaper (be sure to resize first, or use the smaller version above).
Thanks for stopping by today, and be sure to visit back frequently over the coming days/weeks as I will be continuing all the updates from the trip. And don't forget to place your vote below, and leave a comment as to why you voted as you did.
- Bill
PS: Alastair, enjoy the photo, perhaps we'll meet again underwater some day in the future. Best of luck getting certified!
 PPS: As a 'prize' for the 'Photo of the Week', the fantastic staff at Wakatobi presented me with a fabulous cake made up to be a coral reef. The cake was absolutely fantastic and I shared it with our entire group! The pink stuff on the right is some strawberry roll which was my favorite dessert of the week, and the staff were attentive enough to notice that and give me one of the leftover pieces as additional 'prize'! If anyone from Wakatobi is reading this, thanks again for a most memorable week!

