Reply to comment
Merry Christmas (part 1)
ktuli — Fri, 12/24/2010 - 00:25
Welcome all, and Merry Christmas! I've got posts for at least today and tomorrow (and maybe a couple bonus days after Christmas - we'll have to see). I hope everyone is enjoying a safe and happy holiday season (whatever you celebrate). 
I decided to pull out a couple abstract photography techniques tonight, so take a look and see what you think. These manage some very interesting looks, and are surprisingly easier than you might think!
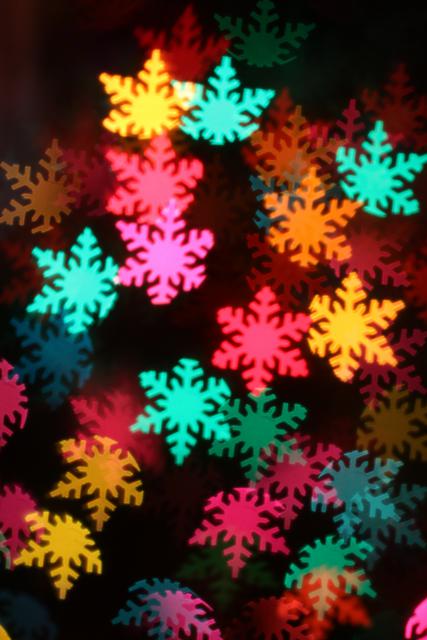
Intentional Defocus
I got the idea for this one from this Adorama Learning Center article on creative ways to shoot your tree. They say you need a tripod, but I shot mine hand-held with no problem...
Technical Data: Canon EOS 7D, Tokina AT-X M35 Pro DX AF 35mm f/2.8 Macro 1:1, 1/8th sec at f/2.8. ISO 200. No post production.
This is the easiest technique of all. Turn on your Christmas tree's lights, turn off the room lights. Set your widest aperture, flip to manual focus mode, then completely defocus your shot to make the tree lights turn into large globes of colored light. Then fire away. Easy as sliding down a chimney (or so I've heard!).
If you want, you could adjust the focus a bit to meet somewhere in the middle, and give more of the outline of the tree - this would work great if you've got a nice dark background (perhaps an outdoor decorated tree). Experiment!
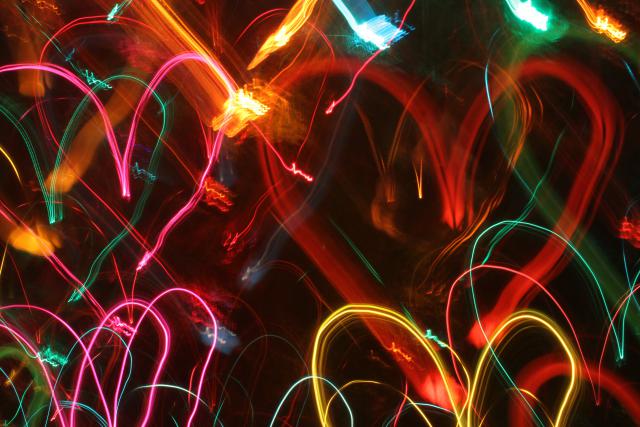
Camera Drawing
I don't know if that's what this technique is called or not - I'm sure I didn't just invent it, but I like that name, so we'll go with it. Actually - I just flipped through one of my creative photography books - it has a similar technique that involves tossing your camera, and of course there is the option to draw with your light while light painting.
But this technique gets a little more specific and detailed...
Technical Data: Canon EOS 7D, Tokina AT-X M35 Pro DX AF 35mm f/2.8 Macro 1:1, 5.2 sec at f/22.6. ISO 200. No post production.
This time, we're using the smallest aperture possible, which means you'll need a longer exposure (note this one was about 5 seconds long). I'd recommend shooting in manual mode, and playing around with the shutter speed to find what works well giving your amount of lights and complexity of your drawing.
Once you trip the shutter, intentionally "draw" your shape in the air with your camera. Unless you want to flip the shot in post production, you have to "draw" your shape upside down. It is a little tricky at first, but take your time and try it. It took me several shots to get these hearts drawn in a way I was happy with. Make slow, smooth motions and try to time the end of your "drawing" with the end of the exposure time or you'll end up with a bright spot.
Here's a couple other attempts:
So much fun! Ok - one more technique, but I'm just going to post a couple photos today - you'll have to stop back tomorrow (or maybe the day after - go enjoy the holiday with your friends and family) for the quick "how-to".
|
|
||
Use the now regular mouseover technique to get the small thumbnails to display in the larger image area.
This one was a ton of fun, and still pretty easy (though it does take a little more preparation). But I'll share that tomorrow.
Till then, go hang those stockings, set the cookies out, and spend some quality time with loved ones. And feel free to try out any of these techniques in between taking those memory saving photos.
- Bill

