telephoto
First Hummingbird Shot
ktuli — Sat, 09/03/2011 - 19:21
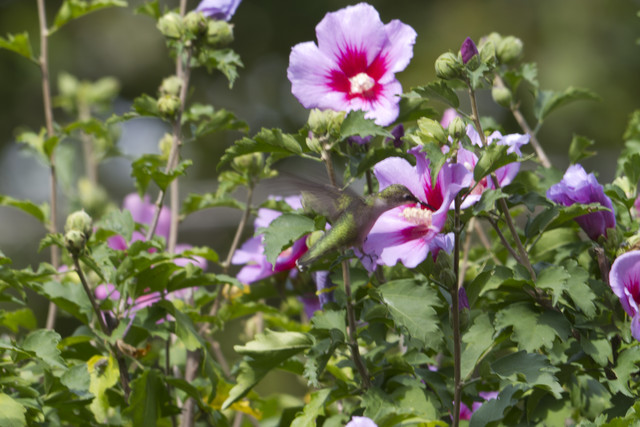
So we've managed to get a hummingbird to be a regular visitor to our yard this summer. So one Sunday morning after I got home from playing hockey, I noticed her stopping by the feeder and rose of sharon bushes. So I quickly went and got my camera with the Sigma 150-500 and my new tripod (have I mentioned that yet? I don't think I have! I guess I should get around to talking about that at some point, but not right now).
Anyway, I setup and managed to get just a few shots before she wandered off again and I had to go work on some bathroom tile repair work. Unfortunately, I totally did not think things through, and I used a rather slow shutterspeed of 1/30th of a second. Far too slow to keep such a fast moving subject from blurring.
But considering they were my first ever hummingbird shots, I kept a couple just the same...
Technical Data:Canon EOS 7D, Sigma 150-500mm f/5-6.3 APO DG OS HSM at 500mm, 1/30 sec at f/11. OS mode off. ISO 100. Raw processing in Photoshop CS5.
Sorry - no mouseovers for a cropped view on this one... it would just show you just how bad the blur is. At least at the smaller version, it makes it a little tougher to see the blur.
Hopefully I'll get another chance at this before the end of summer and she leaves for warmer climates... next time I'll know to use a faster shutterspeed!
- Bill
PVGP 2011 (part 1)
ktuli — Wed, 07/27/2011 - 06:36
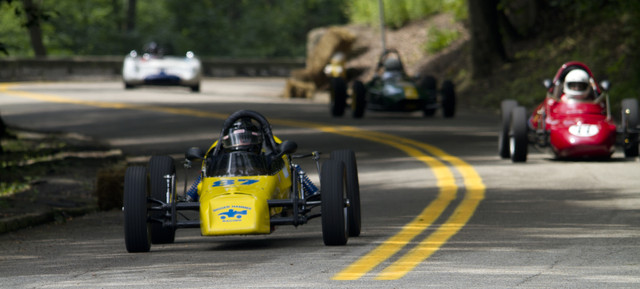
Ok! As promised, we'll take a break from the spiders and bugs for a bit and check out some classic cars. Like last year I took a trip to the Pittsburgh Vintage Grand Prix. Hopefully this year's shots meet your approval...
Technical Details: Canon EOS 7D, Sigma 150-500mm f/5-6.3 APO DG OS HSM at 289mm, 1/320 at f/6.4. ISO 100. 2011 Pittsburgh Vintage Grand Prix, Pittsburgh, PA. Raw conversion and cropped in Photoshop CS5 (mouseover for original)
Why This Photo: I took shots from this vantage point last year too, and I really liked the way you could get multiple cars lined up in the shot. It obviously requires a little luck and patience and good timing.
What Works: The relatively shallow DoF allows for the main car to be in focus while the others are blurred. Additionally, the placement of the cars provides balance to the shot, while the curve of the road produces a pleasing smooth line to lead the viewer's eyes through the scene.
What Doesn't Work: Obviously, in the original, the over-exposed pavement at the foreground was very distracting. It really served no purpose, but as you can see, was very easy to eliminate. The exposure through the shade of the trees on that section of road is always a little tough. Additionally, the front tire of the red car is breaking the edge of the frame, and probably would have been better suited had it been given a little space there.
Stay tuned as I have a bunch of shots to share from the races and the car show... plus, in a rare twist for me, you'll see a bit more post processing - including some B&W and Sepia.
- Bill
Just Out of the Shower
ktuli — Wed, 06/15/2011 - 21:07
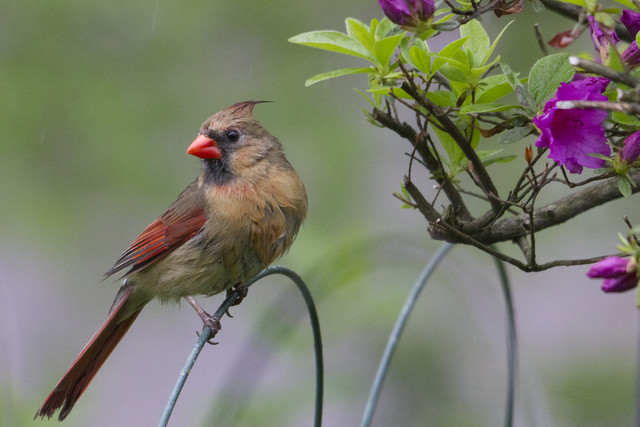
Back in May, I spent an afternoon sitting out in the backyard trying to get some shots of the birds at the feeder. Unfortunately for me, it was cold and then it started raining, so the bird traffic was pretty low. But I stuck it out and got this one... (and I figured folks could use a break from the bug macros).
Technical Data: Canon EOS 7D, Sigma 150-500mm f/5-6.3 APO DG OS HSM at 500mm, 1/500 sec at f/8. OS mode 1. ISO 3200. Dolica AX620B100 tripod mounted. Raw processing and cropped in Photoshop CS5. (mouseover for original).
The bird is a female cardinal (Cardinalis cardinalis) - just a tad wet from flying in the rain. As you can see, the original shot had some very distracting elements to it, so I cropped down to eliminate them. Drop me a line and let me know what you think.
- Bill
Perigee Full Moon
ktuli — Mon, 03/21/2011 - 20:55
Well, as if it wasn't obvious, I continue to be lazy with posts. However, I did make sure I got out this weekend to get some photos, so that's at least a step in the right direction.
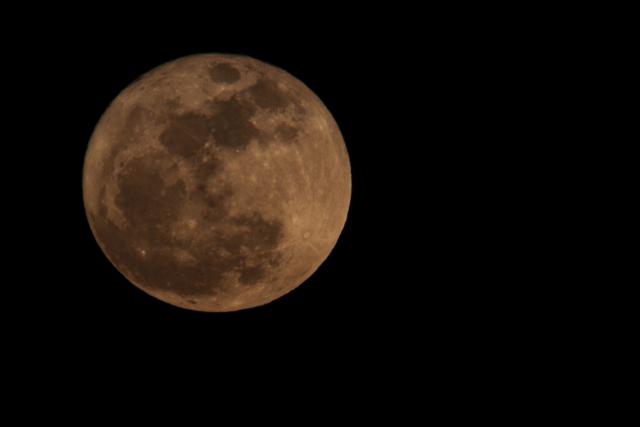
In case you didn't hear, this past Saturday night was a Perigee Full Moon, which basically means it was the largest and brightest possible moon because of its closeness in its orbital path.
Anya and I went up to Mt Washington above the Pittsburgh skyline to catch the moon as it rose to the east. My hope (and apparently the hope of many other photographers who swarmed the overlooks) was to capture a looming large full moon over the iconic skyline. Unfortunately, things didn't work so well in that respect, and after frantically switching lenses a couple times, I settled on hooking up the largest rig I could and captured the following...
Technical Data: Canon EOS 7D, Sigma 150-500mm f/5-6.3 APO DG OS HSM with Kenko Teleplus PRO 300 "DG" AF 2x Teleconverter at 1000mm, 1/100th sec at f/12.9. ISO 800. Dolica AX620B100 tripod and Satechi TR-A Timer Remote Control. No post production. Mt Washington Overlook, Pittsburgh, PA.
At full size, you can even see that the moon is not perfectly round, and you can see the difference in topography along the perimeter of the moon. I also took some photos in RAW format so I can begin working with photographs in that respect, but I have not yet done so, so this jpg version will have to suffice for now.
- Bill
Happy New Year
ktuli — Sun, 01/02/2011 - 21:20
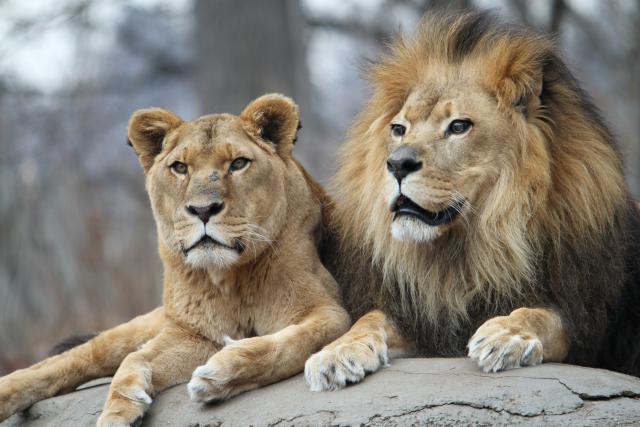
On New Years Eve, Anya and I took a trip to the Pittsburgh Zoo. The nice weather and the holiday meant that the place was swarming with hundreds of kids, so we didn't get as many good shots as I wanted, but I did get some nice ones of the lions.
Technical Data: Canon EOS 7D, Sigma 150-500mm f/5-6.3 APO DG OS HSM at 500mm, 1/100 sec at f/6.4. OS Mode 1. ISO 200. No post production. Pittsburgh Zoo and PPG Aquarium.
Why This Photo: The two lions were enjoying the warmer weather and were interacting with the crowds a bit while resting on their heated rock.
What Works: The eye contact with the lioness and the catch-light in the eye of the male lion are good aspects to draw in the viewer's attention, with sharp focus in the areas that need it most but a soft defocused background to reduce distractions. The placement of the male lion's head rests right on one of the thirds hot-spots.
What Doesn't Work: The lioness's paws just barely break the edges of the frame, and the dark tree trunk in the background is a little distracting behind the lioness's head. And perhaps the shot would have been better with eye contact with both lions.
The other thing we did on Friday was pick up the equipment necessary to take the 7D diving with us during our upcoming trip to Indonesia, so I'll be posting some about that here in the coming days. However, I will need to prepare for the trip, and get as much practice in with the new rig as possible, so posts might be a little slow for a while.
Regardless, thanks for stopping by, and here's hoping you had a safe and happy new year's eve/day and that 2011 treats you well!
- Bill
Racket-Tailed Roller
ktuli — Fri, 11/12/2010 - 19:00
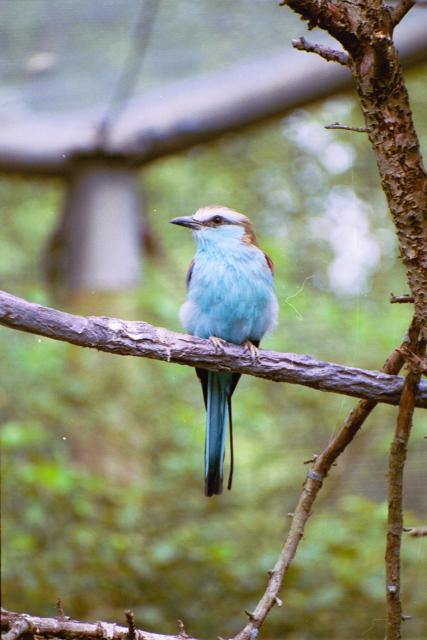
I can't tell you much about this photo. It was taken with our old Canon Rebel film camera. I have no clue what settings were used, and can only guess that it was taken through our Canon 80-200mm lens. But after that great bird photo yesterday, I figured I'd continue with another.
This is a racket-tailed roller (Coracias spatulatus). The shot was taken at the Columbus Zoo in Ohio over four years ago.
I like the grainy look that the film gives this shot, and the beautiful bokeh in the the background is a nice offset to the bright colors of the bird. There's even a nice catch-light in that tiny little eye.
What do you think?
- Bill
Great Blue Heron
ktuli — Thu, 11/11/2010 - 20:18
I'm working on details for a photo trip out to Cedar Creek Park this weekend with some friends, which had me looking through some other photos from previous trips to this park.
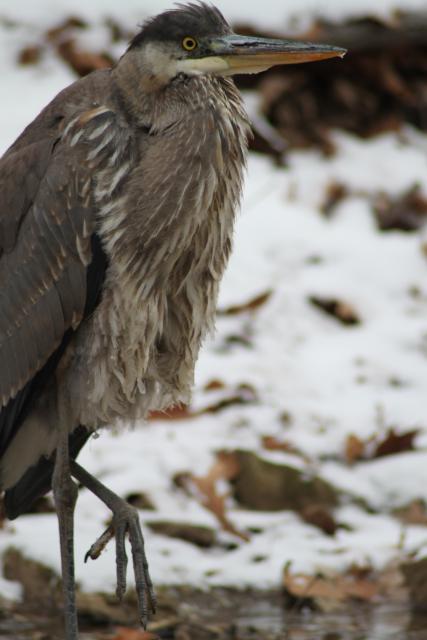
I have another shot of this great blue heron (Ardea herodias), but this wider crop works nicely too.
Technical Data: Canon EOS 7D, Tamron 70-300mm f/4-5.6 Di LD Macro1:2 at 300mm, 1/390 sec at f/5.7. ISO 320. No post production. Cedar Creek Park, Westmoreland County, PA.
Why This Photo: I stumbled on this guy while wandering through the park on a very cold December 30th last year. I instantly switched to my Tamron 70-300 telephoto (my longest lens at the time) and worked on slowly and quietly moving into good position - take photos all along the way.
What Works: For a handheld shot at 300mm, the focus is pretty sharp - especially on the face of the bird. The positioning of the bird's foot gives a bit of a sense of motion as the bird was wading along the stream.
What Doesn't Work: Despite being nicely blurred, the background is still fairly confusing with brown (dirt and leaves) and white (snow) and can be somewhat distracting. Also the crop cutting out the other foot is somewhat unsettling (the same can be argued for the rest of the bird's body, but doesn't seem as bad).
It is kind of unfortunate that I managed this shot in December when the heron did not have its namesake nice blue color, but I wasn't about the pass up the opportunity because of something like that. We saw plenty of blue herons (and even a couple very beautiful green herons) this summer while kayaking, but I didn't have the SLR with me and the SeaLife DC1200 really isn't that functional for shots like this.
Let's hope I can come home with some more new good shots from one of my favorite parks (and hopefully the friends that go with me do too!).
- Bill
Giraffe Closeup
ktuli — Wed, 10/20/2010 - 20:59
Alright, having a rough week, and not doing so great being inspired for what to discuss. I do have a new project I need to start working on, but more on that later.
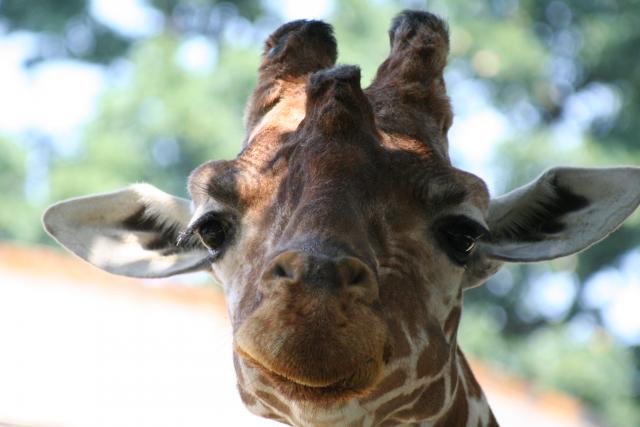
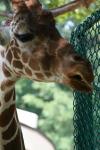
Sometimes, when I am not getting that inspiration, I rely on an episode of "What Hangs on Our Walls at Home". This one hangs upstairs in the set of zoo photos in the office.
Technical Data: Canon EOS Digital Rebel XT, Canon EF 80-200mm f/4.5-5.6 II at 200mm, 1/250 sec at f/7.1. ISO 400. No post production. Maryland Zoo, Baltimore, MD.
Why This Photo: I simply liked the direct shot of the giraffe's face - not an angle you can usually get, but because of the layout of this zoo, and some creative position, this shot worked out.
What Works: Like I said, the framing of the shot has a nice feel to it, seemingly engaging the giraffe's attention. The beautiful bokeh in the background keeps the focus on the giraffe and not on some distracting element behind it.
What Doesn't Work: The lighting isn't exactly perfect with both a strong side-light plus dappled like through an overhead tree. Perhaps waiting till the giraffe moved slightly would have worked, or maybe some fill flash (though I think I was too far away for fill flash to work). Also, the ear breaking the edge of the frame on the right side is one of my regular mistakes that I'm working on improving.
Shots in zoos are always challenging. I like to try and eliminate as many signs of the enclosure as possible - though I still come home with a ton of photos just for the sake of taking them. I think as I progress as a photographer, I am becoming pickier about what I capture, but I still like some of these older shots. They help to show how I've come along from those early days of automatic settings and plenty of flaws.
Perhaps some day I will have the money and time to go on safaris to get photos like this in the wild, but until then I still enjoy visiting zoos and coming home with photos like this.
- Bill
Turtle with Hot Spots
ktuli — Thu, 09/30/2010 - 18:46
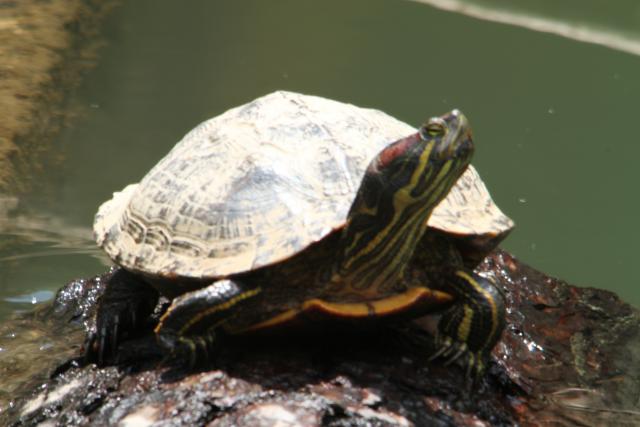
Sometimes, it helps to look at bad photos in order to learn from them. Today's photo is definitely a bad photo.
Specifically, this photo suffers from some terrible hot spots or "blown out" exposure. Basically this is what happens when white areas of the photo lose detail. This happens when you either over expose the photo by leaving the shutter open too long, or by having the wrong white balance set, or most likely when you have the wrong metering mode selected.
Technical Data: Canon EOS 7D, Sigma 150-500mm f/5-6.3 APO DG OS HSM with Kenko Teleplus PRO 300 "DG" AF 2x Teleconverter at 1000mm, 1/50 sec at f/18.2. ISO 200. Dolica AX620B100 tripod. No post production. Kanawha State Forest, Charleston, WV.
Why This Photo: While wandering around Kanawha State Forest, I noticed several turtles in the pond. Periodically they would crawl out on a log to bask. Since any of the shots of the turtles swimming were coming out even worse, I wanted to get one of them out of the water.
What Works: Honestly, not much. The framing is probably the nicest thing, with the turtle's slightly turned head showing off the colors on its head and neck.
What Doesn't Work: Just about everything else. The focus is off leaving most of the photo slightly blurred (possibly from the use of the teleconverter), and there are distracting elements all over the place. However, by far, the worst element is the fact that almost the entire carapace (shell) of the turtle is completely blown out.
Granted this turtle's carapace was pretty muddy, so you couldn't make out much in the way of color, but they are so intricately patterned and textured, that it is extremely unfortunate to lose all that detail. There are some hot spots on the log as well, but the photo is already lost.
This photo was shot almost at noon in late May, so the sun was high in the sky and obviously pretty strong (the turtles were using it to warm themselves). This is probably one of the worst times to be shooting on a sunny day. Had the weather been overcast, this photo would have probably come out very different (though the colors may have been muted).
Other than waiting for the sun to go away, or wishing for different weather patterns, there are a couple things I could have quickly used to find out that I was taking bad photos. Specifically, I could have used my camera's highlight alert or histogram features, but we'll save those for another day.
If I had used one of those features or simply been paying more attention, I could have easily fixed this problem. I could have checked what my camera was using for its exposure, and then manually "under" exposed the image to eliminate these hot spots by either using a faster shutter speed or using the same shutter speed but with a narrower aperture (which actually would have also increased my depth of field to capture more clarity along the entire length of the turtle).
Remember - you probably wouldn't want to frame your bad shots, but sometimes they're good to keep around to review and remind yourself of things you need to pay attention to in order to get better photos.
Thanks for stopping by today! I'll try and find a more pleasing photo to look at for next time.
- Bill
Depth of Field: Frog
ktuli — Wed, 09/29/2010 - 19:23
Alright, I'm sorry about being such a slacker with the posts recently, but between my photography class, and going to a Penguins game, I haven't been home a single evening this week yet.
Anyway, I thought maybe we'd take a look at depth of field. Depth of field in still photography is controlled with the aperture and is defined as the portion of the photo that is acceptable sharpness (not to be confused with focus).
Aperture on your camera is set in f/numbers - a small f/number provides a wide aperture, and a large f/number provides a narrow aperture. I know - it is confusing, but something I've found that makes it easier to understand is to think about it in terms of depth of field. If you select a small f/number, you will get a shallow (small) depth of field. Inversely, if you select a large f/number, you will get a deep (large) depth of field.
But this is much easier to see with examples...
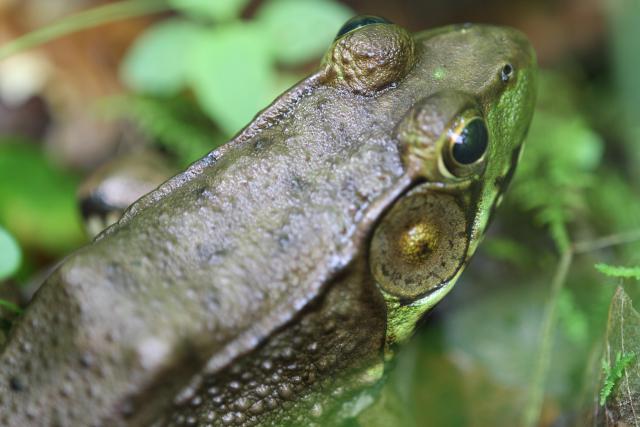
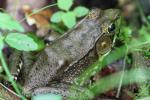
Shallow Depth of Field Technical Data: Canon EOS 7D, Tamron 180mm f/3.5 Di SP LD 1:1 Macro, 1/3 sec at f/3.5. ISO 200. Dolica AX620B100 tripod. No post production. Kanawha State Forest, Charleston, WV.
Notice how the frog is in acceptable sharpness (but technically not tack sharp focus if you look very closely) and the background is pleasantly blurred background as I've mentioned on many other posts.
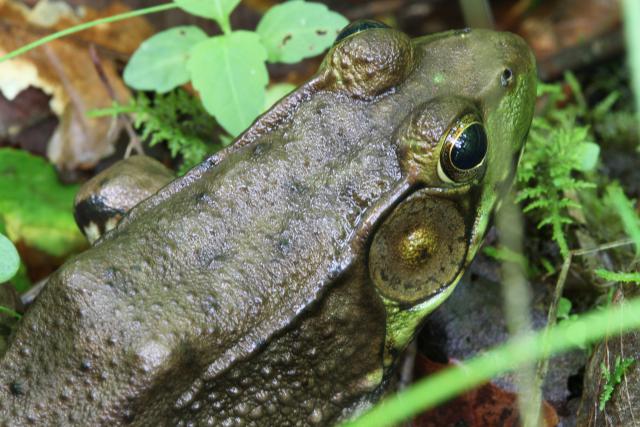
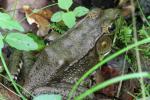
Deep Depth of Field Technical Data: Canon EOS 7D, Tamron 180mm f/3.5 Di SP LD 1:1 Macro, 8 sec at f/18.2. ISO 200. Dolica AX620B100 tripod. No post production. Kanawha State Forest, Charleston, WV.
Here, you'll notice that almost everything is in acceptable sharpness. You can see the detail in the leaves and plants around the frog. In fact, if you look closely, even the texture of the frog's skin is more detailed. However, the blades of grass in the foreground are starting to become distracting with this depth of field.
There are different reasons and different situations that contribute to why you would want to use either shallow or deep depth of field. Sometimes, you can use a shallow depth of field to eliminate some distracting background elements. Other times, you will want a deep depth of field to keep as much of the photo discernible and acceptably sharp.
I also have another set from this frog illustrating some different depths of field...
I also did a couple photos showing the aperture range of the Tokina 35mm macro lens I recently purchased. And a long while ago I did another similar write-up discussing depth of field, but it didn't have photos to compare and contrast.
Hopefully these multiple sets of photos help to illustrate depth of field so you can try it out with some photos in the future.
Leave a comment and let me know whether this made sense or if I should try again...
- Bill

